Thursday, April 29, 2021

Here's To You Paper Pumpkin

It's beginning to feel like spring!  Yesterday's temps were in the 80s and I today it is predicted to be 86!  I'm so ready for the warm weather.  When I went to visit Ashley a couple of weeks ago, I took spring clothes and ended up having to wear some of Ashley's sweaters!  It even got close to freezing one night.  I am ready for short sleeves and capris!  Of course, I don't know if I will fit into my spring clothes from last year.  Due to this pandemic, I have put on about 10 unwanted pounds.  Dessert and goodies every day is not good!!!!  I am starting to count my WW points again and get this weight off.

I have been having a bit of a health scare.  Before I went to Ashley's, I noticed blood in my urine for 3 days.  I went to the doctor and they did a urine test which came out negative.  Next I had a renal ultrasound which showed kidney stones in both kidneys.  So, I went to a Urologist.  He had me do a CT scan a couple of days ago.  I will be going back to the urologist next week to go over the results.  All I do know is that it is not cancer according to the nurse who called me yesterday.  I didn't think cancer was an issue but you never know.  I just had two friends who were diagnosed with cancer.

I have been trying to finish up my Paper Pumpkin cards from last month during all this craziness.  Here are a few cards I have made.


I used the stars mask that came in the Paper Pumpkin kit.  I sponged the stars with Magenta ink and used the Stitched Stars Dies to die cut a few Coastal Cabana and Magenta stars.


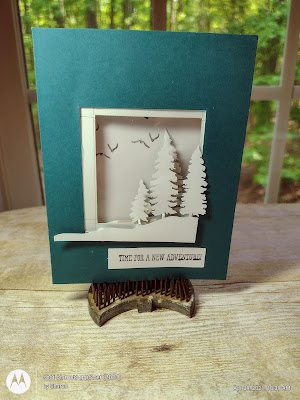
I made a frame from one of the cards.
I fussy cut the flowers, yellow field and trees before adhering them to the card with dimensionals.


The background is one of the envelope liners.  I fussy cut the piece with the clouds and adhered it to the card with dimensionals.


This was a simple one.  I just adhered the panel to a piece of Tranquil Tide which was adhered to a white card.  I tied a piece of twine around the card and adhered the die cut trees that were included in the kit with dimensionals.


I had a scrap of the floral piece (which was an envelope liner) that I adhered to a piece of Petal Pink.  I stamped the flowers in the background and adhered the sunset piece with dimensionals after wrapping a piece of twine around it.


I sponged white craft ink using the star mask that was in the kit on to the 3 1/2" x 4 3/4" Crumb Cake cardstock.  That piece was layered onto a piece of Tranquil Tide and then onto the Crumb Cake card.  The trees die cut piece and the sentiment was adhered and it was done!  Easy!


I sponged a sunset (a little too dark!) onto a 3 1/2" square of white cardstock.  I used another of the masks to sponge the mountains.  I stamped the trees in the background with Pear Pizazz ink.  The stamped square is adhered to a square of Pear Pizazz.   After wrapping a piece of twine, I adhered the piece to the card with dimensionals.  


I wanted to show both sides of the trees - winter and spring!  This is the front of the card.


And this is the card when it is open!


Sunday, April 25, 2021

Pleased As Punch / NC Demo Blog Hop


Welcome to the NC Demos Blog Hop!  We are happy to share our punch-y projects with you this month.  You might have just come from Jo Anne's blog.  Great project, huh?  She always wow's us!

It's always fun to think about our theme and figure out what we will use ... in this case what punch we'll use!  Our monthly NC Demos Blog Hop is featuring PUNCHES.  I love punches!  Don't get me wrong - I like my dies too but it is so much easier to just punch out an image than having to run dies through the Big Shot.  

I decided to use the Rectangular Postage Punch for my two cards.  I don't think I have used that punch since Christmas!!  The good news is that it will be in the new catalog.  Another punch I used (and use all the time!!) is the Banners Pick A Punch.  I used it to "flag" the ends of the sentiment.


  • For this card, begin with a white card base cut at 8 1/2" x 5 1/2" and scored at 4 1/4"  
  • To the front, add a piece of Terracotta Tile cut at 4 1/8" x 5 3/8"
  • Emboss a piece of Petal Pink (4" x 5 1/4") with an embossing folder.  (I used Tasteful Textures.)
  • Using a Blender Brush (or a dauber or sponge), lightly add a bit of Terracotta Tile ink over the Petal Pink card stock.   Adhere this piece to the card.
  • Using the Rectangular Postage Punch, punch out 3 stamps from white card stock.
  • Cut three pieces of Fine Art Floral DSP 1 1/8" x 1 3/4" and glue them to the punched white stamps.  Attach this piece to the white cardstock cut at 4 5/8" x 2 3/8"
  • Stamp the sentiment (from Free As A Bird) on 1/2" white card stock strip using Terracotta Tile ink.  
  • Flag the ends with the Banners Pick A Punch.
  • Add the sentiment to the card front.


My second card is a bit different.  Again I used the Rectangle Postage Punch.

  • Begin with a Pool Party card base cut at 8 1/2" x 5 1/2" and scored at 4 1/4"  
  • Tie a piece of Coastal Cabana Sheer Ribbon around the next two layers before adhering them onto the Pool Party card.
  • To the front of the card, adhere  a piece of white card stock measuring 4" x 5 1/4"
  • Next, layer a piece of Fine Art Floral DSP (5" x 3 3/4") to the white card stock.
  • Stamp the bird from Free As A Bird; use Stampin' Blends to color the bird; use the Rectangular Postage Punch to punch out the bird.
  • Die cut a large and a small Stitched Nested Label.  
  • Stamp the sentiment on the small label; cut one side; adhere to the bottom right.
  • Die cut some leaves from the Free As A Bird dies and adhere to the large label.  Adhere to the top left.
  • Attach the Rectangular Postage Punch with dimensionals.

Thank you for letting me share my cards with you.  Please stop by and see Laurie Meier's post


Amy Austin-Kinler
Jo Anne Hewins
Sharon Maranich  (you are here)
Laurie Meier
Tracie Evans Langley


Monday, April 12, 2021


I'm sad that the Umbrella Punch is being retired!  I pulled out some retired DSP (Pleased As Punch), stamped the umbrellas with Memento Black Ink and punched out several of them.  I scattered rain drops (again using the black ink) all over the card front before adhering the umbrellas on the page.  The sentiment is from Comfort and Hope and the labels are from the die set, Stitched So Sweetly.  I adhered a few colored Dew Drops (non SU) on the card.  


I'm happy that the Stitched Triangles Die will not be retiring!!  This was a fun and easy card to make.  I just found some retired DSP in browns and blues and die cut a bunch of triangles all different sizes.  Then I just played around arranging them on my card.  The funny thing is after I got everything done on the card, I adhered the triangle layer upside down!  Oh well, it really didn't matter.

I will be flying to visit my daughter tomorrow!  I can't wait.  We have no plans but will have fun I'm sure.  She will be working most of the time and I will probably be working in her yard while she is gone.  I'm sure Bogey (her cat) will keep me company!


Thursday, April 8, 2021

A Few Cards to Share

I found a couple more cards that I made using the Pierced Blooms dies.


I love these colors - Magenta Madness, Basic Black and Just Jade!  That Magenta flower just pops off the page!


This card also uses the Pierced Blooms but is much more subtle than the magenta flower above.  I used the Stitched Rectangle dies to create the two "windows."  These colors are Petal Pink, Emerald Envy (retired) and Calypso Coral.


For this card, I copied a card made by one of the NC demos.  The folds are unique with the flower from Art Gallery popped up on dimensionals.  I put a little bit of Gilded Leafing in the center of the flower using Heat and Stick Powder.


This card highlights the Artistry Blooms DSP (which will be retiring soon.)  I colored the birds with Stampin' Blends and fussy cut them from Birds and Branches stamp set; stamped the tree limbs with Early Espresso and added a little but of Gilded Leafing.

I'm sorry I've been MIA lately.  I've been wrapped up in a health issue and trying hard to do my exercises daily!  I was dismissed from PT 2 weeks ago and yesterday got released from the ortho doc.  Next week, I am flying out to visit Ashley for a week!  I'm dreading sitting in the airport and plane with that danged mask on but it will be worth it!  Hope the weather will be good while I'm there.  I'm sure I'll be helping her in the yard!

I received my new SU catalog in the mail this week and have been looking it over!  I have to be honest, there are a lot of floral sets in the new catalog.  Truthfully, I have plenty of florals so that might save me some money.  There were a lot of stamps from the catalog and mini catalog that did not go away so that helps a lot too.  I love the cover of the catalog using Expressions In Ink DSP - that will probably be my first thing to order, along with the new In Color inks and refills.  If you are a customer of mine, you will receive a catalog in the mail in May.

Thursday, April 1, 2021

Paper Pumpkin Here's To You

HAPPY APRIL FOOL'S DAY to you!  No fooling - I have a blog post for you!

This month's Paper Pumpkin is great.  We got some free goodies in this month's kit - stencils (mountains, clouds, starburst & stars) and a sponge which I cut into 5 pieces.  The stencils have been a challenge for me.  I still need to work on them!  I think the elements in this kit work well for masculine cards.  Another good think in the kit is envelope liners along with kraft envelopes.  Usually the liners are already in the envelope and in order to use them as an element on the card, you have to cut the envelope apart.  


This background is from one of the envelope liners.  I had scraps left over from it which I fussy cut three of them to make candles and popped them up with dimensionals.  The sentiment came from a retired stamp and die set, Broadway Birthday.


This card was on one of the cards that was in the kit.  I cut the "scene" out and matted it onto Bumblebee cardstock.  I stamped and fussy cut the trees in the bottom left.


I die cut the scenery piece with a die from the Layered Circles.  I die cut (with scalloped Circle Die) a piece of white and matted the scenery piece on it.  I used another piece of the envelope liner and tore it along the bottom before attaching it to a piece of Calypso Coral.  The ribbon I used is the very last on the spool of a piece of Grapefruit Grove.


More floral paper from the envelope liners and a scenery square.


Another envelope liner.  I used the Layered Circles dies and stamped the flowers with Calypso Coral.


Here’s a sneak peek at what Stampin’ Up has designed for April’s Paper Pumpkin kit, it’s one that can be shared with the family! This entertaining and ‘SO COOL’ kit can be shared with your children or grandchildren providing lots of summer fun! What’s even better? This kit has been designed to coordinate with the Sweet Ice Cream Bundle featured in the Spring Mini for added enjoyment and projects!  You need to order by April 10 to get the April kit.


Wednesday, March 31, 2021

Easter Cards

 Have you made all your Easter cards?  It's time!  


This card was making with elements from last month's Paper Pumpkin kit (Bouquet of Hope).  Everything on this card came straight from the kit making it easy (except sentiment!)


This one took a little time to make - I think about an hour but I love it.  These dies are my favorite!  I haven't even used the stamp set yet.  The dies can stand on their own.   These dies and stamps will be available on next year's catalog BUT not as a bundle.  If you like this set, I would suggest you purchase it now and save 10% by buying them as a Bundle.


These are all the dies that come in the Pierced Blooms Dies - 25!!  If you decide to get these dies, I would suggest that you take a picture of them so when you are crawling around on the floor because you dropped one of the dies, you'll know which one you are looking for!!  

Monday, March 29, 2021

Retiring Sale Items You Don' Want to Miss!

 I hope you are planning on taking advantage of Stampin' Up's Retiring sale.  I ordered some things today that I couldn't resist!   


Here are some of the good sales that I noticed.

  • Lasting Elegance Dies (#151475) – $34.00 $8.50
  • Subtle 3D Embossing Folder (#151775) – $10
  • Woven Heirloom (#149306) – $24
  • Stitched Shapes (#152323) – $30
  • Trio of Tags (150667) - $16.00 $4.00

LASTING ELEGANCE - just $8.50!!

It’s worth it to pay $8.50 for these dies – even if you only use one of the two floral dies or the beautiful frame, but you can buy the coordinating stamp set if you want to have both.


Trio of Tags - just $4.00!


This one sure surprised me!  I use my Stitched Shapes almost every time I make a card.

I have relied on my Stitched Shapes Dies and Subtle 3D Embossing Folder A LOT since they were introduced. We’ve had a great run (and I’ll be sad to see them go), but I have no regrets because I’ve used them so much and I am sure I still will!


Friday, March 26, 2021

LAST CHANCE PRODUCTS SALE


If you love great deals, the Stampin’ Up! Last-Chance Products Sale is the perfect time to shop. You’ll get deep discounts on your favorite products from the 2020–2021 Annual Catalog—and as an extra bonus—you’ll get a peek at the list of items carrying over to the other catalogs. Many items will sell out fast, so don’t delay.

Details

  • Sales Period: 24 March, 1:00 PM (MT) – 3 May 2021, 11:59 PM (MT)
    • Only select items in the 2020–2021 Annual Catalog will be discounted.
    • Sale applies to all order types except host items (see Last-Chance Products List for items on sale).
    • No minimum purchase is required.
    • Retiring items are available while supplies last.
    • Items and discounts may vary by market (depending on inventory levels).
    • Exclusions apply: Carryover items and some retiring items will not be discounted.
    • Items carrying over from a mini catalog into another mini catalog will not be available until that catalog is released.
    • Items carrying over from the annual catalog to another catalog will be available continuously.

Order Deadlines

  • Phone:  3 May 2021; 6:50 PM
  • OEX/Online: 3 May 2021; 11:59 PM
CLICK HERE TO SEE THE PRODUCTS LEAVING US - BYE BYE - PRODUCT SALE!
 

Wednesday, March 24, 2021

Gilded Leafing

 Well, my order for the Gilded Leafing finally arrived!  I have been having fun using it in different ways.  I love the stuff!  Do you ever just have those days when you can't stop playing around with something?  Yeah, that was me last week.I keep finding new projects to use this Gilded Leafing on.  

Gilded Leafing comes in a small jar.  The jar is full of gold flakes that can be used to add beautiful accents to any of your projects.  The leafing has to be used with some type of adhesive to hold the leafing to your project.  It doesn't have any adhesive on itself.  By adding adhesive to a card, then placing the told flakes over top and removing the excess, you'll have a beautiful and glamorous gold accent left on your project in the same areas as the adhesive was applied.

When you first open your jar of Gilded Leafing, you'll want to have a storage container nearby.  You want an open container big enough to insert your card into that has a sealable lid like a Rubbermade  container with a lid.  When you shake the gold flakes out of the original jar, they will keep coming ... and coming ...and coming!  So be prepared with your container!

To use the leafing, first apply some type of adhesive to the area you want the Gilded Leafing to be.  I have used Tear and Tape, Heat and Stick Powder and multi-purpose glue (Tombow).  This glue works well because after it is dry, it is still sticky.  A glue that dries to a hard finish will not work.  Once the glue is applied, set the project aside to allow drying time.  When dry, either sprinkle or rub leafing onto your project OR dip it into your container of gold flakes.   (You can also sprinkle the leafing on wet glue.  Just set it aside to dry before rubbing off the excess.)  To get rid of the excess leafing, I've found that rubbing it first with my fingers and then with a soft sponge works well.  Another idea is to use a soft toothbrush.  Gently rub the sponge (or toothbrush) over your project until all the excess has been removed.

Here are a few tips:

  • Use a large sealable container
  • Use a Microfiber Cloth to clean up loose flakes on your hands and work area.
  • Prepare multiple projects at one time.  This limits the mess I create and how many times I need to wipe off my hands.
  • Experiment with the Gold Leafing.  Experiment with adhesives, application ...Don't limit yourself to just paper.  Enjoy and let me know what you think about this new product.
Here are a couple of cards I made using the Gold Leafing:


I applied the score tape across the card; removed the backing of the tape and stuck it down into my leafing container.  Next I used my sponge to take away all the excess.  I cut this piece in half to make 2 cards.


This is one of the cards I made using Magenta cardstock.


This one was made using Terracota Tile.

The flowers on these cards are colored with Stampin' Blends.  The flowers were fussy cut from True Love designer paper.


Friday, March 19, 2021

More Note Pads with Flowers and Field DSP

 Happy Friday.  Tomorrow is the first day of Spring but it doesn't feel spring-like today!  It's 50 degrees and dreary looking!  We had a couple of spring like days earlier in the week but it's deserted us!  

Here are the rest of the little note pads that I made.


For all of these I used the Flowers and Field DSP (from Saleabration).  
I made the flowers with the Pierced Blooms dies.  Also, that cute little bow is included in these dies.


Again, Flowers and Field DSP.  I used the Daisy Punch for the one on the right and the Pierced Blooms dies for the other one.

I used the rectangular shaped die from Painted Labels Dies (coordinates with Painted Poppies stamps.)  After die cutting the piece, I left the card stock inside the die and using my stylus, traced a line all around the die (on the back side).  When you are done, take the card stock out of the die and flip it over ... voila! a beveled edge!  It makes a great look for these dies.