Thursday, September 28, 2017

Vermont Vacation


We were on vacation last week in Vermont.  Why Vermont you ask?  Well, it's a state we had never been to so now we can check Vermont off our list!  Ashley was in Chicago for work and met up with us for the week.  We rented an apartment (AirBnB) in Montpelier and made day trips each day to different parts of Vermont - Stowe, Burlington, etc.  If I was to do it again, I would not recommend doing it that way.  It was a lot of driving every day.  It would be better to stay in 2-3 areas of the state.  Vermont was much more rural than we anticipated but it was a very pretty state.  The leaves were just starting to change.  I think in another week or two they will be at their peak.  The weather caught us all by surprise - it was much warmer than we had thought it would be - in the 80s every day, even reaching 90 on the weekend!!  

We stayed busy the whole time visiting museums .... and breweries.  Who knew Vermont had so many micro breweries???!!  They have a program that you can get a brewery passport and visit the different breweries and get your passport stamped.  After six stamps, you can get a bottle opener; twenty stamps and you get a tee shirt; and up to forty breweries for other prizes.  Well, you know we weren't going with just six and we weren't there long enough to do forty, so we decided to do 20!  It was fun to try all the different beers - even for me and I'm not a big beer drinker.  I prefer cider and most places had that so we all found something we liked.

Thought I'd share a few pictures from the trip with you.  Unfortunately, something happened to a lot of my pictures.  When I downloaded them from my phone to my computer, I was missing 3-4 days of my pictures.  Haven't figured out what happened.  I'm hoping Ashley's pictures can fill in my gaps.


We took a tour of Ben and Jerry's.  Believe it or not, I don't think I have ever had their ice cream!  It was good and an interesting tour watching them make the ice cream.

This mural of famous Vermont peopl was painted on the side of several buildings in Burlington just off Church Street and was fascinating.  Church St Marketplace was a fun and interesting experience.  Lots of restaurants, stores, galleries, bars, breweries and lots of fun people watching.  

Ashley and I walked down to Citizen Cider Brewery while Sonny was at another brewery in Burlington.  Another stamp on our passport and the cider was good.

This was the best tree I saw - in the parking lot of ..... another brewery!

Idletyme Brewing Company - we actually came here twice - once just for the beer and a few days later for dinner.  It is located in Stowe and was one of the larger breweries we visited.

This was also at Idyletyme.  They had a nice garden - growing vegetables, flowers like this large sunflower and hops!

Magic Hat was one of our first stops on our tour and was located in South Burlington.  We were able to take a tour here of their beer being made.

Ashley and Sonny at Magic Hat.

We took a gondola ride up to the top of the mountain and then went on a hike.  This is Ashley and I at the top (or as far to the top as I was going!)  Note Sonny is not with us!  He turned back about half way up.
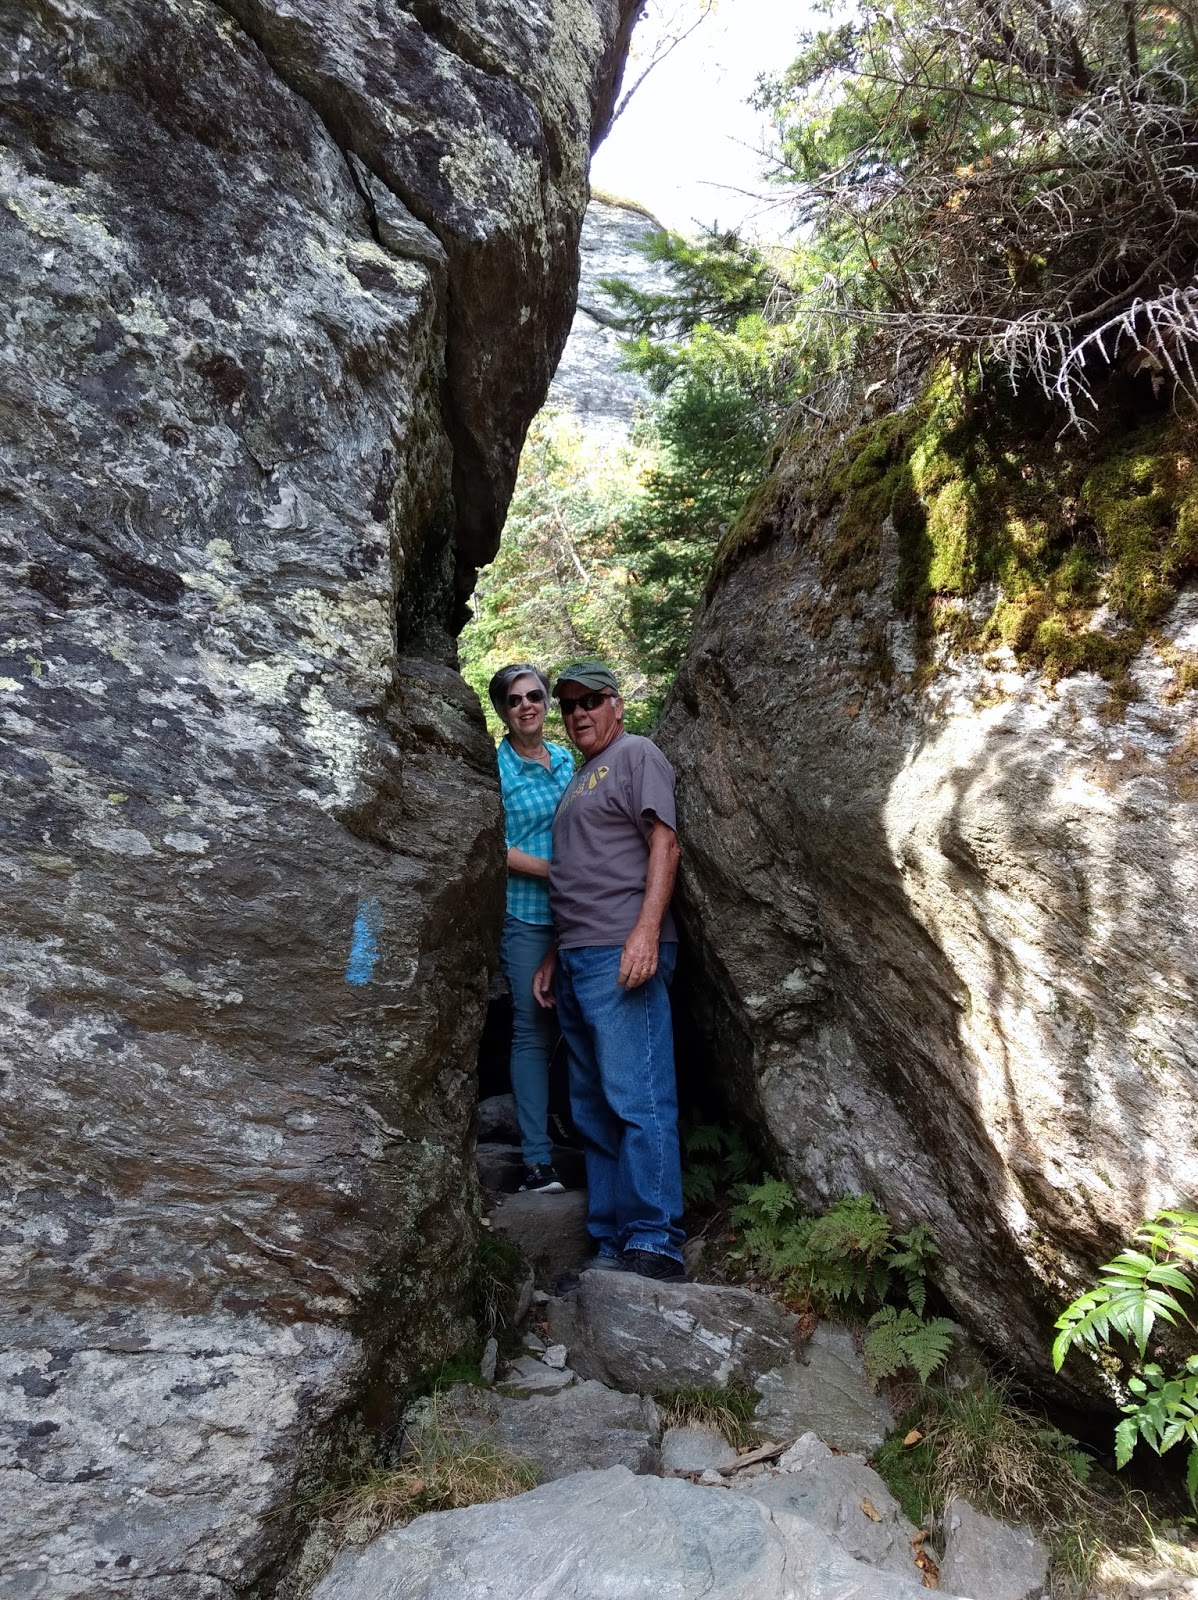
This was when Sonny turned around and went back down.  It was much more difficult that we thought - just rocks all the way.

This was the look-out when we got out of the gondola.

Think I added a few pounds on the trip!  Although I did not order this Poutine (a Canadian dish of french fries and cheese curds topped with brown gravy), I had to sample it!   Sonny ordered this one the day we arrived and on the day we left!

This is the Von Trapp Lodge - a 2,400 acre 5 star resort which is managed by one of the Von Trapp descendants.  The original home of the Von Trapps burned down in 1980 and this lodge was built.  They also have a brewery that we visited and had lunch.


Wednesday, September 27, 2017

Painted Harvest - love it!

I don't know why it took me so long to jump on the band wagon and order Painted Harvest stamp set from the Holiday Catalog.  But I'm so glad I finally did!  I played around with the stamp set yesterday and came up with several cards using this stamp set - even a Christmas card!


For this card, I made the plaid background using the Brushstrokes background stamp.  I inked it in Real Red and stamped it; next I inked in Garden Green and turned the stamp 90 degrees and stamped again.  I stamped the smaller flower (this is a two step stamp set) with Garden Green and used the little dots in the set to stamp Red berries.  The "J" and "Y" are from a really old alphabet stamp set that I have but it would also look great using the Large Letters Framelits.


The color combo for this card is Marina Mist (for the large flower stamp) and Night of Navy for the smaller flower.  It is super easy to use this two step stamp - no worries on lining it up.  The middle of the flower is Soft Suede with Espresso dots.  The leaves are stamped in Wild Wasabi.  I stamped off (2nd generation stamping) on everything except the Espresso dots.  I just love the gingham ribbon!!


This color combo is Crushed Curry and Cajun Craze.  Cajun Craze is not a color I use often, but when fall comes, it is my "go to" color!  I staped the leaves in Old Olive (stamping off).


My final color combo is Wisteria Wonder and Elegant Eggplant with Pear Pizzaz leaves and Daffodil center.

So what do you think????  So many ways to use this stamp set.

Wednesday, September 13, 2017

Let There Be Peace On Earth!

This song was sang at church a few weeks ago magnificently!   I wish everyone could have been there to hear the vocalist sing.  He had such a beautiful voice that I could have sat there all day listening to him sing.  I wish I had a recording of him singing "Let There Be Peace On Earth" but I did find this version of Vince Gill singing it and it is very good also.

Enjoy!


Monday, September 11, 2017

2014 Paper Pumpkin???!!!


I've been on a Paper Pumpkin kick lately.  I had lots of pieces of previous Paper Pumpkins left over that I had stuck in a box.  So I pulled them out and tried to use them all up by making alternative cards with them.  The Pinwheel Party Paper Pumpkin came out in June 2014!  Yes, I was surprised too that I had so much left over from 3 years ago!  But this particular kit was to make pinwheels and we got a lot of materials to make them with.  I made a few pinwheels back in 2014 but that was it.  But now, I have all these cool cards made with the parts and pieces!  I tried to make most of them as birthday cards because how many 4th of July cards do you send????  Not many I bet!


June 2014 Paper Pumpkin- Pinwheel Party


Football season is here so that's where I'll be on Sundays .... watching my Steelers play!  They won today by the way!

Sunday, August 27, 2017

NC Demos Blog Hop for August

It's the end of the month and time for another NC Demos Blog Hop!  Since the end of August is all about going back to school, we thought that would be a good theme for the month.

Since I don't have a small one going back to school, I decided to go "old school" and revisit an old technique that was popular when I started out with Stampin' Up way back in 2005.  Garden Collage was one of the first stamps that I bought and I still have it.  I don't know that I will ever get rid of it - I think it is rather timeless.  Here is the card I made back in 2005 using Garden Collage and the Crayon Resist technique.


I decided to use this retired stamp again and create a newer version of the card but still using the Crayon Resist technique.


Next I did the Crayon Resist technique on a current stamp in the catalog - Oh So Eclectic.  This highlights the technique better.


Have you tried the Crayon Resist technique lately?  If you've forgotten how (like I had!) here is a quick tutorial for you.

*  Stamp the image (flowers from Oh So Eclectic) randomly on Whisper White cardstock and use a marker to color them.  I just colored the centers leaving the edges white.
*  Use a white crayon to color any areas you want to remain white (the edges of the flowers).
*  Also use the crayon to color over the parts you colored with the markers to keep the ink off.
*  Next sponge all over your image with ink (Melon Mambo and Flirty Flamingo).
*  Take a paper towel and buff the image, removing the crayon marks.
*  Finish your card - I used the Cable Knit embossing folder for the Melon Mambo strip across the card.


Now follow along to Frances Wagner's blog and see what she has done this month.  I am sure it will be special!!  Here are members participating in the blog hop this month:

Tamra Davis
Jo Anne Hewins
Tracie Evans Langley
Sharon Maranich - you are here!
Frances Wagner
Christina Walker

Saturday, August 26, 2017

August Paper Pumpkin, Giftable Greetings

I really love the August Paper Pumpkin!  I have been playing with it this week and made the following cards with it - some using the instructions provided and many more using the supplies to make alternative cards.

For those of you who don't know what Paper Pumpkin is .... it is a really fun project kit that comes to your house with all the supplies you need to make the project inside.  You can either make the project as it was intended (by following the instructions provided) or you can get some inspiration and make a few alternative projects.

Now is a great time to join Paper Pumpkin with the amazing introductory rate that is being offered during the Fall into Savings promotion.  If you subscribe from August 11 - September 10, Stampin' Up will deliver September's (gorgeous) Paper Pumpkin kit straight to your door, complete with everything you need to make the project - all for 50% off!  Just sign up using promo code HALFOFF0917.  You can use the link above to sign up by September 10.

I die cut Happy Birthday and adhered small strips of Calypso Coral and Peekaboo Peach cardstock to the bottom of the card.  Sponging the flower makes a big difference - so does Wink of Stella!

This card uses the instructions that came in the kit.  The only difference is that I stamped Happy Birthday from Happy Birthday Gorgeous.

Lots of sponged flower on this one.  I love the new crinkled ribbon in Peach!  Happy Birthday, stamped in Calypso Coral is from a retired  SAB stamp set, Perfect Pairings.

This is the box that the cards and envelopes go in.  Makes a great gift!

Another card using the instructions in the kit.  I just added the little marks around the Congrats with a Sharpie.

These are the envelopes that came in the kit.  You could cut them up and use the stripes on a card.  I choose to make my own stripes from card stock and save my envelopes.

I punched out a bunch of stars (retired heart punch) from Peach cardstock and sponged the tips with Calypso Coral ink.  Also just a touch of Wink of Stella on the larger heart.

For this card, I used the negative part of the paper that I punched out flowers and stamped lightly with Soft Sky so I had a guide.  I used markers to then color in the flowers.  HUGS comes from Lovely Inside and Out (with Wink of Stella!)  The white card is matted onto the Lemon Lime Twist card.

I masked off 1/2" all around the white cardstock and sponged ink randomly - Pool Party, Peek-a-boo Peach, and Flirty Flamingo.  The sentiment is from Ribbon of Courage.

This is a very simple card but I think that is what is needed for a sympathy card.  The little dandelions come in the kit - they are the centers of flowers and the "tail" is from just the end of one of the stamps in the kit.  All stamped in Night of Navy.

Another card following the kit instructions.

I tied the crinkle seam binding ribbon around the card and tied the little tag on the ribbon.  Then just tuck flowers and foliage around the ribbon.

These tags came with the kit.  I cut apart the "thinking of you" stamp to make it easier to divide up the words.

I think this is my favorite!  I stamped the Navy flower all over the card and added the sticker centers.  I matted the Congrats oval onto a large scalloped die cut Oval.

This card is very similar to the card in the instructions.  I just stamped a few flowers and added them and the foliage all around the oval.

I hope you enjoyed seeing my samples!  The only drawback to this kit to me was I would have like to had more of the punch out flowers and more of the navy thread.  But I had some navy embroidery floss from my cross stitching days and used some of it on one of the cards.

Sunday, August 20, 2017

Stamp Club Technique Pics

While driving home from church this morning, it dawned on me that I didn't share the final card we made in Club this week.  The gals loved it even if it was a bit on the messy side!  I CASE'd the idea from Patty Bennett.

You need to use glossy paper with this technique.  I temporarily adhered the piece of glossy card stock to my grid paper with washi tape so it wouldn't slide around when I was doing this technique. You will start out by just randomly tearing a piece of scrap computer paper.  Lay your torn paper on the right edge of the glossy paper leaving a little of the white showing and drag your ink pad (the darkest color) over the white area.  When you are satisfied with that, move the torn paper over a bit and repeat dragging the next darkest color right over the white area and the dark inked color.  Next repeat with your lightest ink color.  Now finish the card with embellishments and sentiments.  Voila! A cool looking card!


Dapper Denim, Marina Mist, Pool Party

Calypso Coral, Peekaboo Peach, Daffodil Delight

Wild Wasabi, Pear Pizazz, Lemon Lime Twist

Rich Razzleberry, Berry Burst, Flirty Flamingo

Fresh Fig, Perfect Plum, Wisteria Wonder

What a fun weekend!  Friday I went to my first concert in many years!  My sister and another friend of mine went to see Luke Bryan!!  Oh is he sexy!  It was hot and humid but we survived - singing along to every song!   We got to the venue around 6 and wandered around people watching until the sun was not beating down on our seats even though we did have cover.  There was a girl sitting 4 seats down from us who partied too much in the parking lot I think!  We had spotted her earlier and she was zoned out.  It didn't take security long to spot her and radio for medics.  This was an hour BEFORE Luke took the stage!  Medics and police got her in a wheelchair and carted her out since she couldn't even stand up - but not before she threw up!  They put some kind of Vomit Absorber Powder to soak it up.  Ugh - it was a strong deodorizer smell.  We were able to move to another row behind so that made it a little better. We saw a couple of other people being carted off on stretchers and wheelchairs too - either from the heat or partying too much.  One guy was carted off in a wheelchair with handcuffs!  You pay a lot of money for concert tickets to blow it all being stupid!  I give the security guards, medics, and police a lot of credit.  I'm sure working concerts on a hot summer night is not their favorite duty!


Thursday, August 17, 2017

August Stamp Club

This week was my August stamp club and we made a variety of cards.  I had two ladies today and will have six on Thursday.


I love daisies!  My bridesmaids carried them in my wedding back in 1973 so I guess I have loved daisies for a long time!  My husband used to give me daisies for our anniversary each year with a rose for each year we were married.  Needless to say, he stopped that after about a dozen years!!
This card is stamped with So Saffron, a color I don't use much but I don't know why - I love it on this card!  The Daisy Punch was on backorder for a while but it is now back in stock and one of the most popular punches Stampin' Up has had!


This card was totally CASE-d!  It is called a Wiper Card.  When you pull the side panels, the pig (This Little Piggy) pops up from the inside.  The back of the card (which I didn't take a picture of!) is a circle that has another pig on it and the sentiment "says thanks!"   It was a fun card to make and not as difficult as it looks!


Another fun card using a new set from the catalog - Pocketful of Sunshine.  This card is great for slipping a little of money in the pocket for a special someone in your life.

I hope you enjoyed these projects.  If you have any questions, please contact me.


Wednesday, August 16, 2017

CLEARANCE!!

Stampin' Up! updated the CLEARANCE Rack today with lots of goodies!  Quite a few are perfect to incorporate with Holiday products .....

Gold Wink of Stella
Red and Green Silky Ribbon
Gold Sequin Trim
Classy Designer Buttons
Crushed Curry Bakers Twine
Emerald Envy Taffeta
Gold and Silver Satin Ribbons
White Gift Boxes

These items are only available while supplies last.

There is also this Cheerful Tags Framelits which would be great for Christmas tags!

Cheerful Tags Framelits Dies

And another one - Merry Tags Framelits -
Merry Tags Framelits Dies

AND what a deal on this Designer Tin of Cards for $10.80!


Designer Tin of Cards Project Kit

There are a lot more great deals so head on over and check them all out HERE.