Tuesday, November 4, 2014

Craft Project Central Mix and Match Boxes


Lots to share with you today.  But first I want to share with you the second project for this month from Craft Project Central designed by Yapha Mason.  You can find the instructions at Craft Project Central.

Mix & Match Winter Holiday Boxes & Tags

This festive holiday packaging includes four different size square boxes along with four gift tags that can be mixed and matched.  Using shades of blue and silver, there are options for both Hanukkah and Christmas, with designs that will work for either one.  The project also includes instructions for two square holiday cards as well.


Friday night I dressed up for Halloween.  We went over to some neighbors and sat out in their cul-de-sac with a fire going roasting marshmallows and eating Halloween candy as we passed it out to the trick-or-treaters.  We had a couple of hours of visiting before the rain forced everyone inside.  Sonny and drove in to Mooresville where we were supposed to go to party but Sonny didn't want to go so we ended up at Duckworth's instead.


Sunday night we cheerfully cheered on our Steelers!  Again, another great game and records broken. For the second straight week, Ben Roethlisberger is a nominee for the FedEx Player of the Week!

Monday our Texas friends, Margaret and Graham, arrived.  Sonny and Graham left early this morning to go to S.C. skeet shooting with a group of Golden Boys.  So Margaret and I will be crafting away for a couple of days!


Sunday, November 2, 2014

Count Your Blessings Table Decor

Take time to count your blessings during the upcoming holiday season!  This set includes a blessings bank, gratitude cards to fill out and insert into the bank, place cards to gather blessings from your guests, and a blessings list that your guests can fill in and take home with them.  This set can be used to adorn your holiday table or you can use the box, gratitude cards, and lists as a way to remind yourself how blessed you truly are each and every day!


This ensemble, designed by Michelle Wecksler begins the November edition of great project tutorials at Craft Project Central.

Thursday, October 30, 2014

Paradise Found for MDS Monday


I had fun doing my page this week for MDS Monday!  The theme was to follow the sketch (below) and make it PLAYFUL and COLORFUL!  Well, if you know anything about me, you know I love color!  I am not one that wears dull clothes .... or if I do have on black, I usually have a pop of color somewhere!  I like bright colors and my wardrobe and my cards are a testament to this!

I decided that the pictures that would look the best with the challenge would be my Hawaii pictures.  I visited Hawaii in 2005 (I think) and 2008 with Ashley.  Well, finding those pictures turned out to be a challenge since back then, I printed most of my pictures from my camera.  But, I forgot I had saved them on Shutterfly so I was able to access them.  If you have never been to Hawaii, you have missed a beautiful place.  The flowers there are the most gorgeous I have seen.


This page was so easy to do.  I used a pre-made template and just dropped the pictures in.  The background is from the download kit called Paradise Found and I just recolored it to Turquoise.  With all the beautiful pictures on the page, I didn't think embellishments were really needed.  I added the flower behind the text and the Hawaiian girl (from the same kit).  The title (Hawaii) is actually a punch called Smitten Alphabet that I love.  I use it a lot.

MDSMonday-007
SKETCH
The first time we went, Ashley had just had eye surgery but she thought she was "good to go."  Well, the day after we were there, she had problems with one eye so we had to go to the Army hospital to get her taken care of.  A few days later when we went to Maui, she had problems with the other eye so we had to find an eye doctor in town.  She ended up wearing dark glasses during the whole trip!  So, it is pretty easy to tell which pictures are from the first trip and which are from the second!!

 Here are a few pictures from the trips.
If you watch Hawaii 5-0, this building is their headquarters and is seen in most episodes.

Ashley enjoying a fruity drink - 2008

Ashley & I at the luau.  It was dark so no glasses!

USS Arizona Memorial
Ashley reading the names at the Pearl Harbor Memorial (USS Arizona)

USS Arizona

sunset

Ready for the luau!

Wednesday, October 29, 2014

Stampin' Up Info


Project Life is a great and easy way to scrapbook your memories.


And now Stampin' Up is offering you a chance to win ALL the items in the Project Life by Stampin' Up! line!


Check it out HERE!!  You can either enter your contact information or use your Facebook account to sign up.  The contents ends at 11:59:59 pm Mountain Time on November 30, 2014.  At the very bottom of the sign-up page, there is a spot to enter a link if someone referred you.  I'd love for you to enter my link as the referring source.  Here is my link:  http://bit.ly/1DrFedm  (just copy and paste)


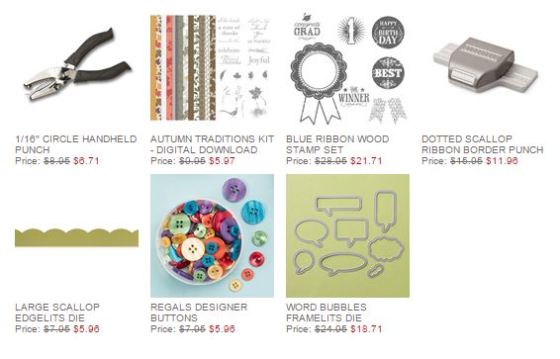
Here are this week's Weekly Deals.  My favorite Framelits Dies are on sale this week - Word Bubbles!!  You can order online by clicking the tab at the top of this page.


Capture


Also the Holiday Supplement is now available for ordering.  Check it out HERE


Screen Shot 2014-10-19 at 4.02.35 PM

What is really hot right now is the Star boxes from the Holiday Supplement.


Inside the kit is everything you need to make 26 star boxes in varying sizes and it includes fabulous
embellishments and die cut words.  The only extra thing you need is glue to attach the embellishments.  The star boxes themselves have sticky strip already applied.  They are easy to make and fun to decorate.

Tuesday, October 28, 2014

Under the Tree DSP with Festival of Trees

I have another Christmas card to share with you today.


There is so much you can do with the Festival of Trees set!  I paired it today with a framed embossing folder.  This folder is retired but there is another similar one in the catalog (pg 227) called Fun Frames.  The DSP on this card is Under the Tree DSP which is a heavier weight paper.  I originally bought this DSP to make boxes with the Gift Box Punch Board but I love the country look of the paper on this card.  I tied some red and green yarn around the card stock.  It is retired but you can still order the green and the white Sweater Trim in the Clearance Section.

Unfortunately, Stampin' Up gave us some bad news today.  They are experiencing significant delays at their west coast ports due to a breakdown in negotiations with union dock workers.  These delays impact items coming from China and include the Wonderful Wreath Framelits Die (which I am waiting on), the Curvy Keepsake Box Die (I have ordered that for a customer) and the Tree Punch.  How dare they strike when we need our stuff for Christmas card making????  Hopefully, negotiations will be worked out very soon!

Monday, October 27, 2014

Little Letter Thinlets

I really like Stampin' Up's Little Letters Thinlets.  They are easy to use - especially with the Magnetic Platform and the Big Shot.  And they are a good size without taking up the whole card.  They are just 3/4" high.  I used them to make both of the cards below.


For this card, I used the negative are of the letters to spell out JOY.  The DSP is from the stack of decorative paper that is in the Holiday Catalog and the little pine cones are from Lovely As A Tree. The embossing folder is actually one I've had before SU came out with their Stylish Stripes.  They are both almost exactly alike.  I really like the traditional red, white and green in this card.


For this card, I embossed the white card with the Stars embossing folder (Holiday Catalog).  I punched the star using the Itty Bitty Accents Pack.  The word "season" is from Everyday Occasions Photopolymer - one of my "go to" stamps for Christmas.  The strip of DSP is from the stack in the Holiday Catalog.


Friday, October 24, 2014

Birthday Celebration

I had a nice birthday dinner celebration with my family at Firebirds.  And I received some beautiful birthday cards.  Here are a few of the beautiful hand made cards I received:

from Marianne - love this stamp set!

from Margaret - another flower favorite!

from Judy - These die cuts are so pretty!

Don't you love this sentiment (from Judy's card)

Joyce did a great job making this origami dress.

This is funny.  The first card I received from the NC Demos, made by my downline, Deb Michael.  Then on my birthday I received the second card in the mail from Deb!!  Love it!

from my upline, Carol Bartle

from Tina Lesson, one of my NC Demo friends.  I have this stamp and haven't used it - need to get it out and stamp.

Angela, Mom, me and Marianne at dinner

Wednesday, October 22, 2014

MDS Monday Challenge

A little late posting today but give me a break .... it's my Birthday!  (Not that I'm counting the years any more!)  I am going out to eat tonight at Firebirds with the family but other than that, nothing special planned.  Just doing what I feel like doing today and not doing anything I don't want to do!

I played around with My Digital Studio today creating a page for the MDS Monday challenge.  Another tricky one this week.  The first challenge was to change the size of patterned DSP when you fill a punch with patterned paper (DSP).  The way to do this is fill a punch (or photo box) with DSP; then double click on the shape and you can zoom in or out on the patterned paper by clicking on the "plus" and "minus."  The next challenge was to insert a picture in a group of photo boxes.  To do this you select the photo boxes you want to fill; group them together; then drag your photo in.

I can't tell you how many times I aligned these boxes!  Every time I thought I had them all lined up, I'd look again and see a "boo-boo."  Just don't look too hard or you might see one but I think I got them mostly aligned!!


So what do you think?  I love this picture of the peacock strutting and showing his beautiful feathers.  I took this several years ago at Fort Sam Houston while Marianne and I were visiting Ashley.


Tuesday, October 21, 2014

Suspended Festival of Trees

Whew!  Just finished pulling the Steelers through to a Monday Night win against Houston Texans.  We didn't look so good at the beginning of the game and let Houston score on us twice right off the bat with a touchdown and a field goal.  Even the fans at Heinz Field were booing their team!  But then the Steelers woke up and got three touchdowns and a field goal in less than three minutes at the end of the second quarter to turn a poor start and a 13-0 deficit into a 24-13 halftime lead.  I was whooping and hollering with Sammie trying to sleep on my lap.  She didn't know what was going on!!  We ended up winning with a score of 30-23.

Here is another "suspended" card using the Festival of Trees this time.  You can get the directions for the basics to making the card from yesterday's post.


Don't let my husband tell you he doesn't like cats!  Check this out:


Monday, October 20, 2014

Suspended Stars

Happy Monday!  I had a nice relaxing weekend.  Sonny and I went to the movies on Friday and saw The Judge.  It was very good - I would recommend it.  Saturday night we went to some friends house and played cards.  And Sunday, I got a lot of Christmas cards made.  I still have a lot to go but at least it is a start.

This is a fun card.  I guess you could call it Suspended Stars.  The starts are suspended between the top and bottom pieces of cardstock (which is covered with DSP). This card uses the stamp set, Bright and Beautiful.


Suspended Star Card

Inside of card

You cut your card base at the normal 5.5" x 8.5"; then trim it down to 5.5" x 5.75" and score at 4.75".  From the piece that is left over, cut a strip at 1.5" x 5.5" for the bottom.  Stamp your star and adhere it at the top to the top piece of cardstock and to the strip that you cut for the bottom.  The star holds the top and bottom together.

I have made a similar card to this one using Festival of Trees which I will share with you later.