Friday, August 14, 2020

More Paper Pumpkin Alternatives

Still loving this month's Paper Pumpkin.


Simple one - I just matted the postcard onto Coastal Cabana and then onto the white card.  I spritzed the card with a mixture of alcohol and Frost White Shimmer paint.  I should have stamped the sentiment after I spritzed as it made the ink run a little bit.


This is one of the little tea candle bags that I cut apart.  I used Stickles on the "burst."


This is a card using pieces from June and July's kits.


Wednesday, August 12, 2020

July Paper Pumpkin Alternatives

Here are a few of the July Paper Pumpkin alternative cards I made.  This Summer Nights kit is such a fun one.  Instead of full cards in the kit, it came with materials to make little tea light baggies and 9 postcards.  


For this card, I used Blackberry Bliss cardstock for the base.  I cut 2 strips of the postcard that came in the kit and used dimensionals to pop up the carousel. 


Night of Navy is the base for this card and a layer of Coastal Cabana.  On one of the postcards I stamped the fireworks with black Memento ink.  I also stamped the meerkats from the Sale-a-bration stamp set and colored them in with my black marker.  The picture above looks like they are not colored in well but when you look at the card itself, it looks fine.


This is one of my favorites!  It is a shaker card with the fireflies inside the vellum jar.  I sponged the grass and the sky.


Love this sentiment!  It's hard to see but I squeezed a bit of Wink of Stella underneath the firefly.

Tuesday, August 11, 2020

Celebrate Sunflowers with a Watercolor Wash & Glassine Paper

More sunflowers!!  I really love this stamp set.


This card was an experiment.  I was cleaning up and found a package of glassine paper that I bought several years ago.  I cut a piece and wadded it up and then straightened it out.  I took the Cinnamon Cider ink pad and rubbed it all over the paper.  I adhered it to the white scalloped piece and stamped the sunflower and leaves on it.  I matted it onto Cinnamon Cider cardstock and then onto Thick Whisper White cardstock.  It's different and adds a little texture to the card.


This is a card I received from my upline.  It's so bright and cheery!


For this card, I did a watercolor wash onto watercolor paper with Granny Apple Green, Coastal Cabana, and Highland Heather.

Friday, August 7, 2020

NC Demos Stamp-a-Long

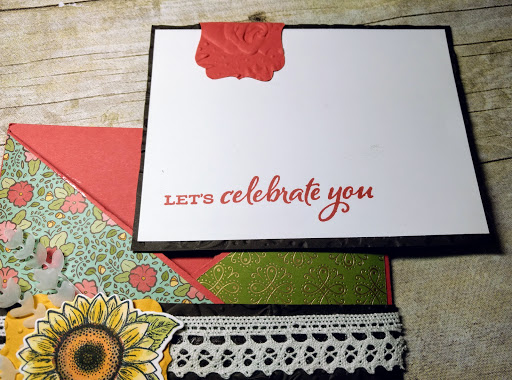
Our NC SU Demos did a Stamp-a-Long in June and July.  Different demonstrators demonstrated their  cards during a Facebook Live presentation.  It was fun to stamp along with the gals virtually.  Here are a few of the cards I made while watching the demonstrators on-line.


I love this fold!


Thursday, August 6, 2020

Box of Sunshine

Everyone could use a little bit of sunshine in their lives right now.  So, today I have a Box of Sunshine I want to share with you!  It's the June 2020 Paper Pumpkin kit and it's full of bright and cheery card ideas!

The first thing I do when I receive the kit is to make the cards based on the designs as featured in the kit.  I have noticed the kits seem to always contain extra items to play with, so there are lots of opportunities for me to get creative and make additional cards later.  Besides, it's really fun to be able to just sit and create without all of the fuss of coming up with the designs, right???

So the first 4 cards I created are the designs from the June Box of Sunshine kit.  Quick and simple card ideas.  I simply organized all of the supplies and stamped my greetings first.  Once that was complete, it took me about 15 minutes to put all of the cards together. . . instant gratification!


The next card ideas I have to share showcase some of the fun ways to use the leftover supplies from the kit.  Of course, I added a few of my own supplies such as cardstock and patterned paper.  There were pineapples, lemons and sunshine shapes leftover after putting together the cards from the kitl.  So, here are the fun cards I made:


I used a small flower punch to punch out these flowers from a piece of watercolor paper that I had painted with my Aqua Brush using Bumblebee, Poppy Parade, Bermuda Bay and Just Jade inks. 


A watercolor wash on Shimmery White cardstock.


This was a fun one!  I used my Score Board to score lines across the white card front.  Next I used SU Blends (or you could use markers) inside each scoremark.  I died a piece of ribbon to match the pineapple.

Wednesday, August 5, 2020

Sending Sunshine

Oh, I love the beach and I have reservations to go in a few weeks!  Can't wait!  This was the first stamp set that I got from the annual catalog when it was released - Sending Sunshine!   Can't wait to feel that beach sunshine on my face.


The base card is Balmy Blue.  I used the Stampin' Up! Sending Sunshine photopolymer stamp set to create an ocean sunrise scene on a Whisper White panel.  I started by stamping the deep water in Balmy Blue ink and stamped the shallow water over it in Balmy Blue ink AFTER stamping off.  I stamped the rising sun in Bumblebee ink and the rocky shore in the back with CI innamon Cider ink.  I masked and colored the sky with sponge daubers in Balmy Blue.  The clouds are stamped in Misty Moonlight stamped off once.  The sand is sponged on with Sahara Sand ink.  I matted the piece onto Whisper White cardstock.


This card is done pretty similar to the card above except I colored the sun with Mango Melody ink.  I stamped the Crumb Cake cardstock with the Birch background stamp.  I used the Stitched Sweetly dies.

Tuesday, August 4, 2020

SWAP CARDS

The Holiday Mini Catalog is now LIVE and available for purchase in our beautiful NEW On-Line shop.  If you click on the Holiday Catalog in the left column, you can view all the wonderful items available.

07.01.20_TH_AD_CATALOG_US

Here are some key features of our beautiful, new online store:

  • Designed to work seamlessly on desktops, tablets, and mobile phones
  • New and improved store navigation
  • Larger imagery
  • New sorting and filtering options allowing you to find things more easily
  • Inventory status information so you can make an informed purchase decision
  • Create and share up to 10 personalized wish lists (my favorite new feature!)
  • New ‘Quick Shop’ feature makes it easy to add items to your cart
  • Simplified checkout process

ALSO .... if you click on the HOSTESS CODE (left column of this blog), it should take you directly to the ON-LINE STORE and it should indicate that you are shopping with ME!!  


These are cards I received in swap hosted by Debbie Henderson.


By Vicki Stevens using Flowers for All Seasons pattern paper


by Debbie Britland - using Forever Blossom stamps and dies


by Carolyn Deleo - Painted Poppies


Monday, August 3, 2020

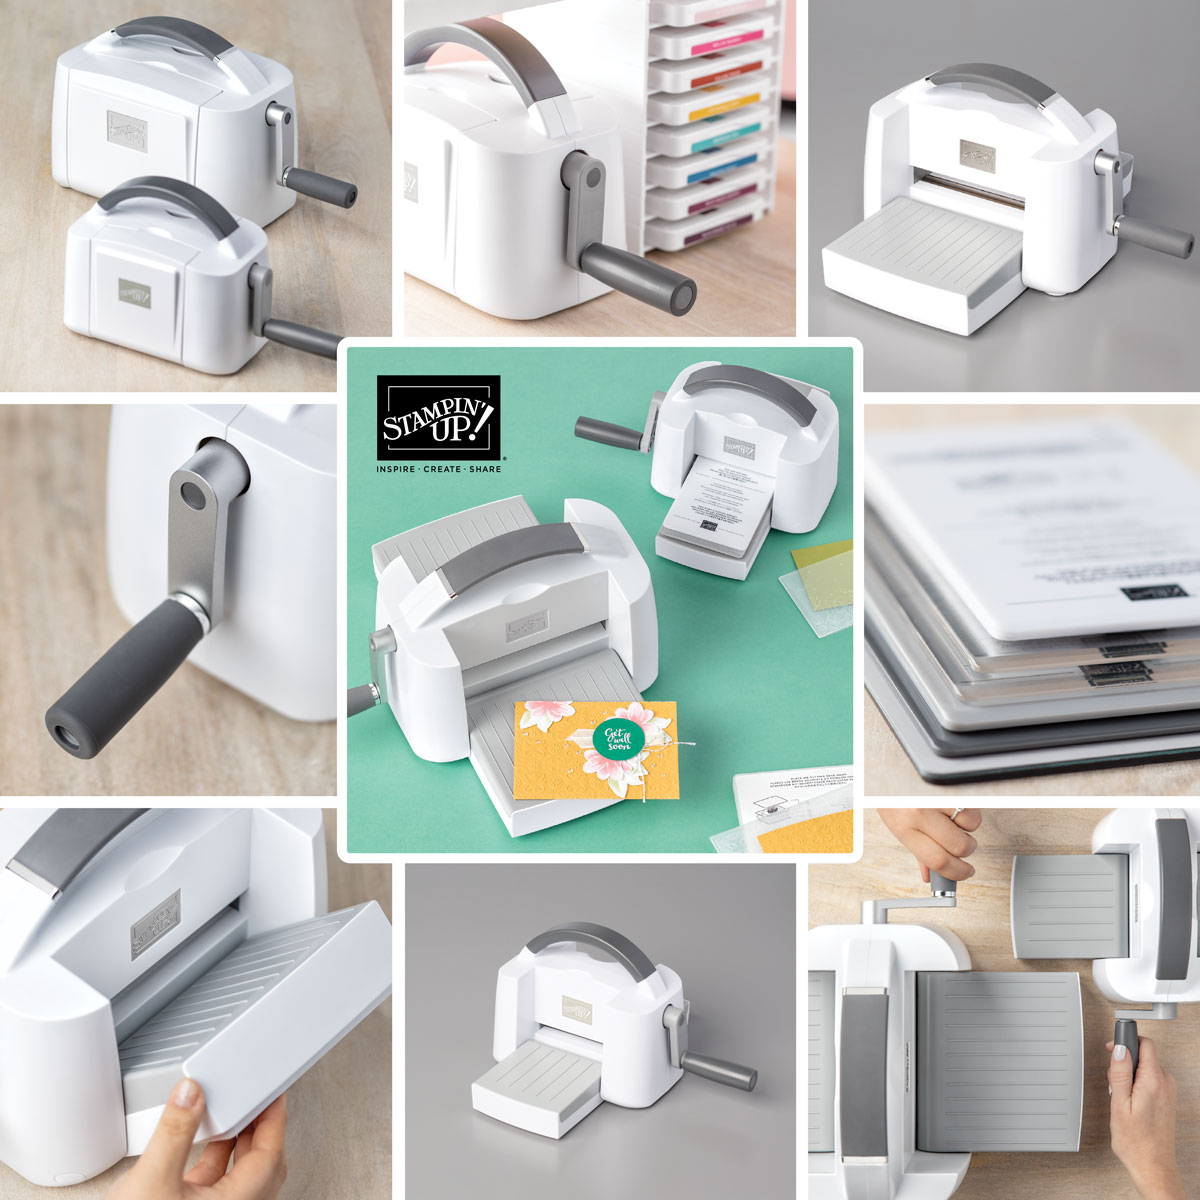
BRAND NEW Stampin' Cut & Emboss Machine

On August 4th, all Stampin' Up! Demonstrators will
have the opportunity to pre-order/purchase the
BRAND NEW STAMPIN' CUT
& EMBOSS MACHINE

YOU CAN TOO!
A WHOLE MONTH EARLY!

This is the best deal ever for you! Why? Read this:

  • Customers can only order this product in SEPTEMBER
  • Do you want one on August 4th?
  • How would you like to pay $99 instead of $120.00 and FREE SHIPPING?
  • You can join my team and order the machine ONE WHOLE MONTH EARLY. No kidding!
  • Savings of $21.00 on the price and $12.00 on the shipping for a grand total savings of  $33.00
  • Use item #149653


NOTE: Our Mini Stampin' Cut & Emboss Machine
will not be ready until later in the year.

Friday, July 31, 2020

Make Your Own Patterned Paper!

It's fun to make your own patterned paper!  You can customize it to match your project. When looking through your stamp set collection, look for sets that have small images.  I like to choose stamps in a variety of different sizes.  This makes it much easier to ensure that you don't end up with a lot of odd "white spaces" scattered throughout the pattern you create.  Technically, you could use medium or large stamps.  However, the larger the stamp, the harder it is to create any kind of pattern.  That is because each stamp takes up so much space, you can't fit many images onto your paper.

When I have stamped my own patterned paper in the past, I selected one image and randomly stamped it all over the paper and then came in with the next one, and the next one .... you get the picture.  But I have found that the best way to make your own paper is to use one stamp at a time and see where the next image (in a different color) fits best.  It's kind of like putting a puzzle together.

It's easy if you will open all your ink pads and line them up on your desk with each image you will be stamping in front of the ink pad.  That way you don't get confused and put your stamp into the wrong color of ink!  Start near the center of your card with your largest image and then fit the other images puzzle like around the first one.  I like to start off with the larger image and then stamp each of the other images around the first one.  If you notice on my paper below, I stamped the Melon Mambo image first and then stamped the other images around it making sure you leave some white space and don't stamp on top of your images.  While you have everything out, go ahead and make 3-4 pieces of patterned paper or stamp one whole sheet of cardstock and cut them apart.  Be creative!!


Ink Colors used:  Granny Apple Green, Melon Mambo, Flirty Flamingo, Just Jade, Pretty Peacock, Melon Mambo, Coastal Cabana

Stamp Sets used (all retired):  Happy Birthday Gorgeous, Endless Thanks, Thoughtful Blooms

And here are two of the cards I made:


All the die cut pieces came from the Well Written Dies.


I cut the strips on an angle and layered them onto Coastal Cabana cardstock.  

Wednesday, July 29, 2020

Summer Nights Add-on Package

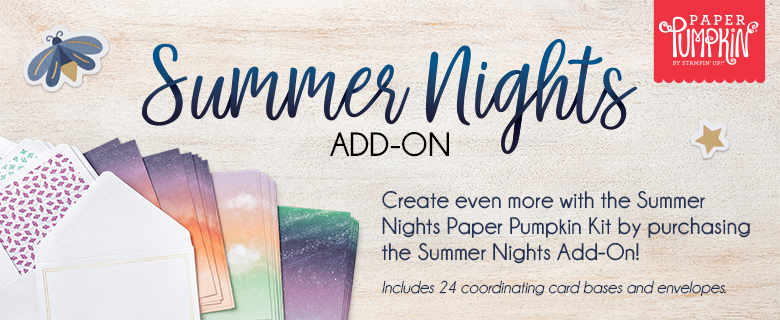
Whether you subscribe to Paper Pumpkin or not, here is a good deal you might be interested in purchasing.


Paper Pumpkin Summer Nights Add-On


For $10 you get 24 card bases and envelopes!  What a deal .... and look how pretty the card bases are!

The July Paper Pumpkin - Summer Nights - is great!  They seem to get better each month.  Here are 3 of the cards I made with the instructions in the kit.


I love the ferris wheel and roller coaster.  Although I'm a big chicken and won't ride either of those!!  I hate to get stopped at the top of the ferris wheel and I always felt like I was going to get thrown out of my seat in the roller coaster.  The only roller coasters I would ride over and over again is at Kennywood Park near Pittsburgh.  There are three roller coasters there that I like to ride - The Racer and The Pippin and The Jack Rabbit.  They are all wooden roller coasters and not the steel ones that turn you upside down and backwards.   


I love the vellum jars in the kit.  I have traced a few of them onto vellum to use on other cards.


Aren't these lanterns so cool?!  (Even if  I did get ink on a couple of them and I didn't even notice it until I looked at the photo!)