Wednesday, August 21, 2019

Stitched Label Box

I actually have some cards to share with you today!  I had Stamp Club Tuesday and even though it was a small group, we had fun and make some cute projects.

First off - although we did this one last - was the Stitched Label Box.  I found this on Brenda Quintana's blog and love it so much.  I was hoping not to overwhelm my gals and had all the pieces die cut for them which helped a lot except when I gave them the wrong measurements for scoring!  Luckily, we discovered it early enough that we didn't waste too much paper.  You can die cut all the pieces for the box out of one piece of cardstock if you are mindful about placing the dies on the paper.  You will also need 2 pieces 10 3/8" long.  I used Whisper White Thick Card Stock for my box and the Bird Ballard Designer Paper.  You only need a 1/2" strip of DSP (10 3/8" long) so look through your stash  and pick something that you have just a strip of.  Some of the boxes we made today used the Magnolia Lane Designer Paper.  The stamping on the top of the box is from Good Morning Magnolia.


I hope you will try and make this cute box - it really is not hard!!

STITCHED LABEL BOX

2 ea. 2nd largest Stitched Label Die (LABEL #1)
2 ea. 3rd largest Stitched Label Die (LABEL #2)
1 of the 2nd smallest Die  (LABEL #3)

Thick Card Stock
(1) 10 1/8” x 2” (BOX BOTTOM)
(1) 10 3/8” x 2” (BOX TOP)

Designer Paper – 10 3/8” x 1/2”

BOX TOP LID (w/Designer Paper)
Cut 10 3/8” x 2” piece of Thick Whisper White Card Stock
Adhere a 10 3/8” x ½” Designer Series Paper strip.
With Designer Paper on left, score down the 10 3/8” strip at 1 5/8” (on short side)
Turn ¼ turn to right (the scored line you just did should be at the bottom & the DSP at the top)
On long side, score at:  2 ¾” 3 7/8”, 5”, 7 ¾”, 8 7/8” and 10” 
Notch at each fold.
Adhere the piece end to end.
Adhere Tombow glue to notches
Attach the 3rd largest Label Die (Label #2) to box lining up both long sides w/label die piece & press down to adhere.
Attach the largest Label Die (#1) to bottom, centering it.

BOX BOTTOM
Cut 10 1/8” x 2” piece of Thick Whisper White card stock.
On short side, side @ 1 5/8” mark.
On long side, score at 2 5/8”, 3 ¾”, 4 7/8”, 7 ½”, 8 5/8”, 9 ¾”
Fold your score lines & notch (V) at each score line.
Adhere the piece end to end like you did for the lid.
Put the box top over top of the box bottom to hold the shape.
Adhere Tombow Glue to tabs & adhere the largest Label die (#1)

Now stamp on Lable #2 & Label #3, color & adhere to Box Lid

You can find this video at Qbee’s Quest website

Wednesday, August 14, 2019

Traveling again!

I was traveling again.  Last week we loaded up Sonny's truck and drove to Maryland.  We looked like the Beverly Hillbillies with the truck loaded with things we were taking to Ashley's house - bed, mattress, bicycle, armoire, our suitcases and my cat and her stuff!!  It's not too bad a drive to Silver Spring until you get to the DC area where the traffic is awful.  I would not want to fight that traffic every day!!  Sammie (my cat) had never gone on a long trip before and she did really well.  But she was very happy at Ashley's for the first 3-4 days.  She didn't want Bogart (Ashley's cat) anywhere near her and she let him know it by hissing.  She found a little cupboard at the floor level in one of the bedrooms and that is where she stayed for several days.  When the movers delivered the stuff, we didn't have to lock either cats up.  Bogart stayed under one of the beds and Sammie stayed in her little hidey hole cupboard and wouldn't come out!  


Sammie liked looking out the window.

This was taken after we were there for a week and they were tolerating each other!
Her Hawaii things arrived bright and early Monday morning and were there until about 4:00.  Most everything arrived in good shape ... except they could not get her queen box springs upstairs!  The house was built in 1930 and the upstairs were added in the 60s I think.  The stairs going upstairs and to the basement are really narrow going up (or down) and also narrow from side to side.  There are 3 levels to the house with three bedrooms upstairs and two bedrooms on the main level which she is using as an office and a small den.  Downstairs is the basement with half of it finished (kitchen, den, bathroom.)  She has ordered a split queen mattress and should be able to get it upstairs.  On Thursday, her things she had in storage in Texas arrived.  It wasn't much at all except - her couch was not in the shipment!!  Who knows where it is?!  Ashley has had problems with the company who handled that part of the move since Day 1.  Now they are doing a search for her couch!  By the time we left on Sunday, we had emptied all of the boxes and Sonny had made several trips to the dump to get rid of the boxes.  But there still is much to be done.  Now it is up to Ashley to figure out where everything goes!

Sonny was in charge of checking off the boxes as they were unloaded from the truck.

The front living room - all the boxes were moved from this room - hurray!!

Empty boxes waiting to be loaded in Sonny's truck for a trip to the dump!

Stained Glass Pizza restaurant - relaxing before the crazy begins!

Wednesday, July 31, 2019

Remember Me???

Surprise, surprise!  Remember me?  Sorry to be such a bad blogger but the summer has been like a whirlwind!   I was in Hawaii for 3 weeks which I think was the last time I blogged anything!  The visit to Hawaii was a lot of fun.  I went there to help Ashley with the move back stateside.  The day that the movers came to box up her things was terrible.   The packers were supposed to come one day and then the crew to load up the crates was supposed to come the next day.  Well, the packers came and packed up a couple of rooms before saying they had to leave for another job.  The next day they didn't show up until noon after several phone calls from Ashley to the moving company.  At 7:30 at night, they still hadn't done a thing in the kitchen!  We were pretty mad to say the least!  They finally finished around 11 pm.  We got to the hotel in Waikiki a little past midnight!  We stayed in the hotel about 10 days.  I was so thankful that Ashley's condo was on the other side of the island because the Waikiki side is LOUD!


I had a couple of mishaps while I was there this time.  First, I almost missed my flight!  I was sitting in the AMEX Lounge at DFW airport enjoying my breakfast when I got a call on my cell phone from American Airlines wanting to know where I was.  The plane was in it's final boarding and the doors were going to be closing in 3 minutes.  I took off running and luckily was able to get on one of the golf cards and he got me to the gate in time.  I think I had set my watch wrong and thought I had plenty of time.  A lesson learned - always put your cell phone number on your reservation!!

The next mishap was at the end of our trip.  We were at the beach enjoying the sunshine.  Well, the waves on that side of the island are a lot stronger than on the windward side which is what I was used to.  As I was getting into the ocean a huge wave knocked me backwards.  I could barely get back up or walk.  I thought I had pulled my hamstring because I hurt from my butt all the way down my leg.  Our flight was three days later and I drank several margaritas that day to combat the pain of sitting on the airplane for 6 hours (Phoenix) and another 4 hours to Charlotte.  When I got home, I went to the doctor.  By that time, the bruising had started and she told me just take some Tylenol for the pain.  By the end of the week, I was bruised from my waist to my knee and I was carrying a pillow around to sit on.  Since then I have heard about a man from Raleigh died when a wave knocked him backwards and he hit his head PLUS a retired Charlotte police officer who broke his neck in July at the beach when a wave drove him into the sand.  He will recover but had to have screws in his head to hold a heavy duty cervical collar in place for several months.  Guess I was the lucky one!

My bruising - after 2 weeks!

Ashley was awarded the Meritorious Service Medal in a ceremony while I was there.  It was presented to her by the Hospital Commander, COL Mary Krueger.


The rest of my summer has been uneventful!  I have been doing water aerobics every morning at our subdivision's pool and it has really helped my normal aches and pains.  My mother turned 91 last week and is doing pretty good for a woman her age who is legally blind and has lost her hearing in one ear.  Ashley came for a visit in early July to get her cat, Bogart.  We flew Bogart to Charlotte while I was in Hawaii and Sonny took care of him until I got home.  Ashley closed on her house in Silver Springs on July 15 and has been "living" in her house on an air mattress when she isn't staying with her girlfriends in the DC area.  Her household goods are supposed to be delivered next Monday (8/5) so hope this side of the move goes better than the other side did!  Sonny and I are driving up to Maryland Saturday to help with the unpacking.  We will have Sonny's truck filled to the brim with furniture she is taking from family here plus a piece she bought while she was here in July.

I really have not done much stamping this summer except on my Paper Pumpkin kits.  I wasn't so sure about the In Colors this time but since I've been using them this week, I have changed my mind.  My favorite (I think) is Pretty Peacock but I also love the Terracotta  Tile and Rococo Rose!  I made a couple of cards with the Young At Heart set - it's a really good one for us "old timers!"


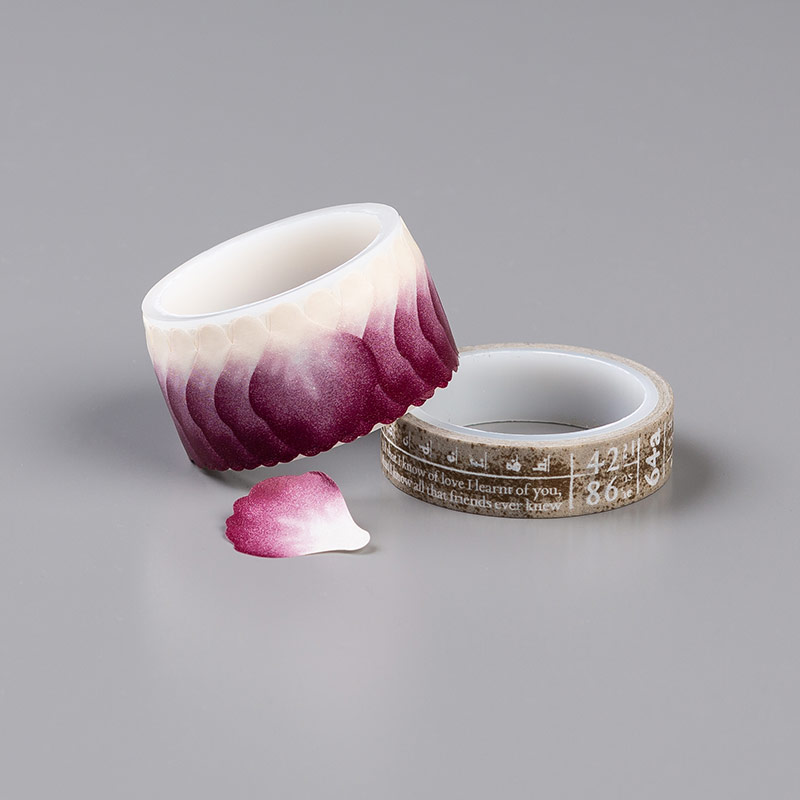
If you are thinking about what to order from the annual catalog, take a look at the Pressed Petals Washi Tape.  It is something you would overlook in the catalog which is what I did and then I saw it being used and Wow!  It is really pretty.  You just pull the individual petals off the roll and create your own beautiful flower.  Just do a search and you will see lots of different projects using this washi tape. 


Sunday, May 26, 2019

Good Morning Magnolia!

I am "leaving on a jet plane" tomorrow and I can't wait!  This will be my final trip to Hawaii.  Ashley and I will return to the mainland on June 17 but until then, there are beaches to be discovered, shrimp to be eaten and shaved ice to be eaten!  I probably will not be updating this blog.  So, I thought I'd leave you with a beautiful card that I made today using the new Good Morning Magnolia stamp and the designer paper that coordinates with the suite!  I love it.


I used my Blends (Flirty Flamingo dark and light, Petal Pink and Old Olive) to color the image and popped it us with dimensionals.  

Everything in this suite is great.  I purchased the bundle that includes some great leaves, flowers, and sentiments to die cut like the "Enjoy Today" that I used on my card.  The dies

Wednesday, May 22, 2019

May Stamp Club

These are the cards we made in Stamp Club last week.


Retiring Sunshine Sayings.  I have a lot of washi tape and let the gals pick the ones they wanted to use on their card.


This is a little 3"x3" card with a matching envelope.  Tropical Chic will be in the new catalog but not the bundle.  So if this is something you like, I'd suggest ordering it now to save a little cash.


My Stamparatus sure came in handy on this card!  Broadway Birthday will be in the new catalog but again, not the bundle.


This was my favorite card that we made.  I love the Powder Pink and Crumb Cake together.  The stamp set, Wishing You Well, is retiring.  Also, the die I used (Swirly Snowflakes) will not carry over to the new catalog.


I let the gals pick the color and the stamp they wanted for this card.  The stamp set I used is A  Good Day, another retiring set.


Tuesday, May 21, 2019

More April Paper Pumpkin

 More cards made with the April Paper Pumpkin Kit.


I fussy cut the stamped flower, misted it with water and scrunched it up.  After it dried, I used Glue Dots to adhere it to the card.


This card and the next one are both Z Fold Card.


I used the Handwritten background stamp on this card.  Don't those flowers look like a pig's face???


Everything is starting to fall into place with Ashley's move.  She has found a house in Silver Springs, Maryland and should be closing June 28!  Now we just need a buyer for her Hawaii condo.  A couple looked at it Sunday and have it on their top two.  Got my fingers crossed that they settle on hers!  Real estate is not going as fast in Hawaii as it is in the DC area.

Wednesday, May 15, 2019

Distinktive Stamps in April Paper Pumpkin

The April Paper Pumpkin kit is probably one of my favorites!  The flowers and colors in this kit are just wonderful.  The April kit also has a new Distinktive stamp image. 

What are Distinktive images you ask?  Stampin' Up! says .....

  1. Distinktive stamps give you photo-realistic images with just one stamp.  They have a special texture that gives added depth and dimension in a single step.
  2. These stamps are available only from Stampin' Up! and are made using a patent-pending process.
  3. Distinktive stamps are available in red rubber and photopolymer; Paper Pumpkin's April kit includes photopolymer stamps.
  4. Shop Distinktive stamps in the online store by searching "Distinktive" or look for the Distinktive icon in Stampin' Up! catalogs.


I fussy-cut the flowers for this card.  The middle flower is adhered with dimensionals.  For the 2 flower in the back, you only have to stamp and fussy cut one flower - just cut it in half!


For this card, I made a mask of the large flower onto a sticky note and stamped the gray flowers while masking the Flirty Flamingo flower.


This card also uses Butterfly Gala to stamp and punch out the butterfly.


I stamped the flower in Mango and used a sponge dauber inked in Flirty Flamingo for the middle.  I fussy cut two flowers (cutting one of them in half).  The background is a very subtle gray polka dot paper that I found in my stash.  I think it came from a SU kit several years ago.


This was a very simple card.  I stamped the flower on a 2" white square and mounted it onto a piece of Flirty Flamingo.  The base card is from the kit as is the water colored strip around the middle.  Tie a piece of twine around the middle and add a few embellishments and you are done!

Hope you enjoyed my cards.

Tuesday, May 7, 2019

More Feathers!

I'm back from my trip to the DC area.  I had fun house hunting with Ashley.  Sonny was supposed to take his golf clubs and play golf while we were house hunting but he thought it would be raining while we were there so didn't take his clubs.  As it turned out, he could have played golf every day.  The rain we got usually started in the late afternoon/early evening.  Oh well - his loss!  He explored the area while we were gone during the day.  We looked at about 30+ houses in the Bethesda and Silver Spring area and that's not counting the few Ashley looked at on Tuesday when we were on our way.  On Thursday, the first house we looked at that day was the one that called to her.  It is a really cute house in Silver Spring that was built in 1936 that has been remodeled but still has that old house feeling.  She put an offer in over the weekend and we have our fingers crossed!!  All contracts are due to the sellers by today at 4 pm.  Ashley is flying home right now and should know something when she lands in Hawaii later.  If she doesn't get this house, she will wait until she moves and start her search over.  Luckily, she has friends to stay with there and is not in a hurry.  But I hope she gets this house!!!

In the meantime, I will share a few more Paper Pumpkin cards that I made from last October's kit.


I inked the leaves with VersaMark and embossed them in copper, silver and gold


I sponged Crump Cake onto the leaf and did a watercolor background of Crumb Cake.


I tied the 3 feathers up with the twine that came in the kit and layered the white card onto Cajun Craze and Coastal Cabana cardstock.


I layered the 3 feathers onto Wood Textures 6x6 DSP.


I used the Pinwood Planks embossing folder to emboss the Bermuda Bay cardstock.

If you would like to check out Paper Pumpkin, now is the best time!  I think the kit designs are really good now and next month's kit will be a favorite of mine.  I like Shelli's style when she presents at Stampin' Up events and this kit looks just as expected with pretty colors, natural designs and fantastic details.

The kit is $19.00 and can be purchased online in my store.   You need to purchase or subscribe by May 10 in order to receive the kit Shelli has designed.  You can just click the one month link to get this kit with no further commitment or consider going month to month with a subscription.  

Sunday, May 5, 2019

Friends of a Feather Paper Pumpkin Kit

Think good thoughts for Ashley.  We are spending the week with her in Bethesda, Maryland house hunting.  Ashley and I love to look at houses.  In fact, many times when I visited her in Hawaii, we would go to open houses of million dollar homes to see how the other half lived.  A girl can dream can't she?!!

I am sharing a few more of the Friends of a Feather Paper Pumpkin kit with you.  By adding just a few extra supplies from my stash and past kits, I was able to play and create (or CASE) cards I'm happy to send out.


This is a notecard that was made directly from the kit.  I love the leaf cut out.


Similar to the note card above.  I just added some stamped feathers and some leaves.  Those feathers came from a retired stamp set, Lovely Amazing You since I have lost the stamps that come in the kit!


I cut away the feathers from the card they were attached to and sponged some of the feathers with Soft Suede and Night of Navy.  I used the Rectangle Stitched Shapes for the Night of Navy frame.


Another card similar to the one above but I didn't add a frame.  The sentiment is from Lovely Amazing You.  I sponged the leaves on top of the sentiment.

Friday, May 3, 2019

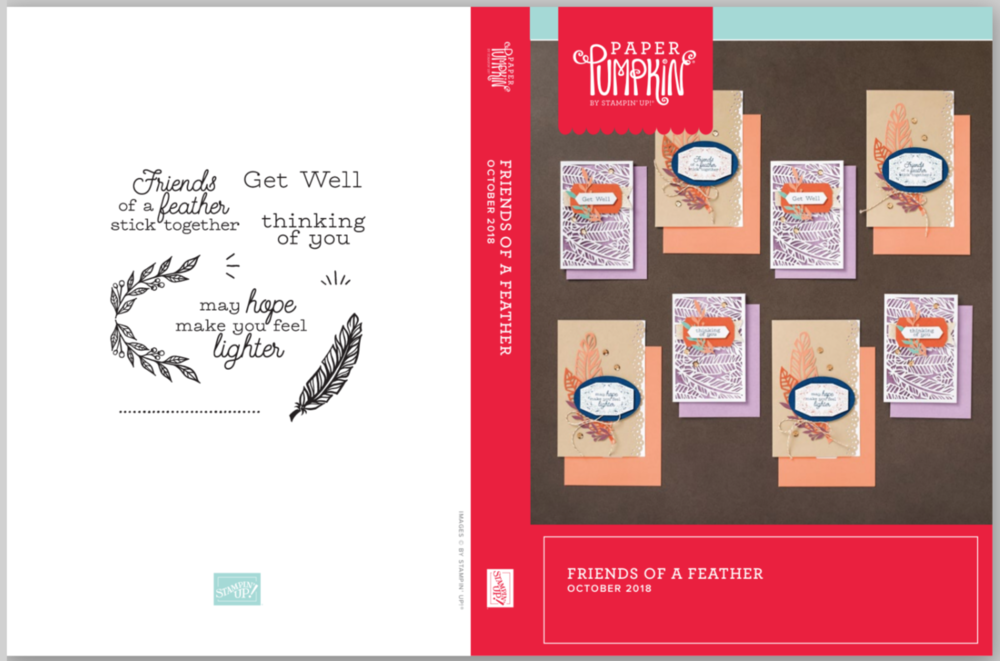
October 2018 Paper Pumpkin - Friends of a Feather

The next Paper Pumpkin kit I tackled was the Friends of a Feather October kit.  For some reason, I cannot find the stamps that came with this kit!!  And I want them so bad!   I am hoping maybe I took them to Ashley's house and left them.  When she is finished with her move, I will be looking through her stuff for it!!

Screen Shot 2018-10-24 at 4.45.21 PM.png

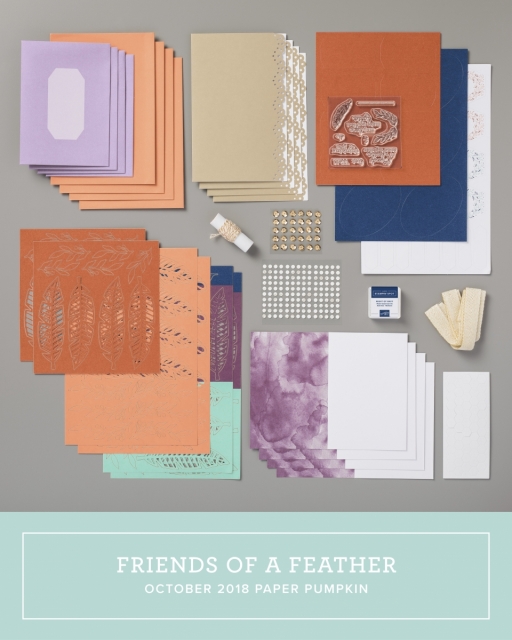
This is all the items included in the kit.  I ended up making about 20 cards with this kit and just adding a few piece of card stock and ribbon.

The October 2018 Paper Pumpkin Kit: Friends of a Feather! …#stampyourartout #stampinup - Stampin’ Up!® - Stamp Your Art Out! www.stampyourartout.com


For this card, I embossed the Coastal Cabana card stock with the (retiring) Hexagon embossing folder.  I matted the Coastal Cabana piece onto Mango Medley and then onto a Night of Navy card.


For this card, I cut the scalloped white piece in half.  It is actually Crumb Cake on the back side.  I embossed the Crumb Cake piece with the Pinewood Planks embossing folder.  Sneak peek - Smile is from a new stamp set called Daisy Lane that I received at On Stage in April.


The card base is thick Vanilla cardstock.  I spritzed different colors of ink onto the Vanilla card.  The feathers were colored with daubers in Night of Navy, Blackberry Bliss, Cajun Craze and Poppy Parade.  Just noticed I am missing a couple of sequins on the card!