Monday, February 3, 2014

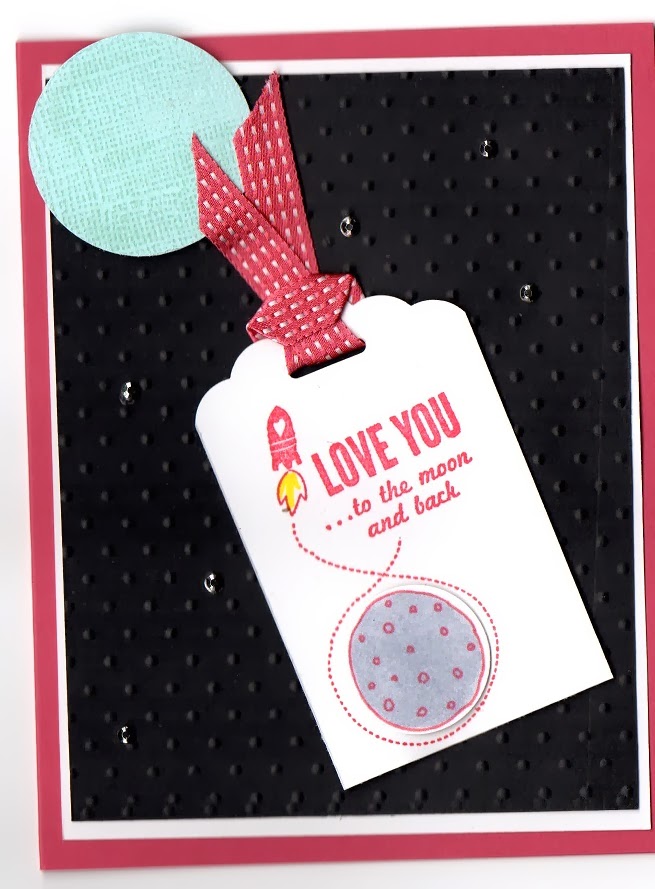
Love You to the Moon


Hope your weekend was a good one like mine was.  Saturday my two downlines (Marianne and Debbie) and I went to a Shoebox Swap at another demo's home in Conover.  There were 14 of us there and we made some great cards.  I got so many good ideas for stamp sets in the Occasions and Sale-a-Bration catalog.  I will be posting them in the next week. 

These are the cards that Marianne and Debbie made.

Marianne - Vivid Vases from Occasions catty
I just love the saying "Love You to the Moon and Back."  I haven't decided if I'll get this stamp set but I do love this particular stamp for it's saying.  
Debbie - Love You to the Moon = Occasions catalog


After the Stamp-a-Stack, we met the family for Angela's birthday dinner at Sagebrush in Mooresville. 


Sunday I did a little house cleaning in my stamp room.  I worked on a few projects that I have had for a long time and just decided to put them together.  Not sure what I will do with them but they are made anyway!  Sonny and I watched the Super Bowl.  I was sure surprised with how badly Denver played.  I thought it would be a close game with the winner being determined in the last few minutes.  Boy, was I surprised!  I was pulling for the Seahawks even though I picked Denver to win in our football poll.  Saw a stat that said Denver has now lost more Super Bowls than any other team in history.   I didn't even win any of the Super Squares and had some good numbers.  I wasn't very impressed with the commercials this year.  Loved seeing the Budweiser and Coke commercials and my man, Bob Dylan in a commercial.  Lots of car companies this year.


View image on Twitter
Thought this was cute - with the white Bronco (representing Denver) being chased by the Seahawks!  Reminiscent of the O J Simpson chase many years ago.


Thursday, January 30, 2014

2014 Calendar

Before Christmas, I made several calendars using My Digital Studio.  One of the gals I made one of the calendars for asked me to make another one for her sister.  I decided to use stamps and paper to make this one instead of MDS.  Most of the stamp sets that I used are retired.  She really loved it and is taking it to her sister in Florida next week.

Button Buddies Stamp

Love You More stamp & Hearts A Flutter

Owl Punch


Single Stamp (All Ears???) and Fringe Scissors

Retired Daisy Die and Butterfly Die

Whale Sizzlit

No Stamping - just Patterned Paper

Perfectly Preserved

Wetlands

The More the Merrier

No Stamps - 5 Flower, 1" Circle and 2 3/8" punches 

Holiday Lineup
If you are interested in buying a calendar similar to this one, let me know.  I sell the calendar plus a wooden display to hang it on for $20.

Wednesday, January 29, 2014

See Ya Later Alligator - Paper Craft Challenge #78

I tried to post last night but our internet was soooo slow!  Don't know if it's the weather causing it or not.  I just reset our internet connection and hope that will solve the problem.

So, it started snowing yesterday around 1:00 pm and didn't stop until after dinner time.  It was a fine light snow and only got about 1-2" accumulation.  I had an eye dr. appointment this morning at 9:30 and was a little worried about driving.  As it turned out, all Sonny's buddies "wimped" out this morning on going shooting so he was able to take me, plus I called and got the appointment moved to later in the morning.  Actually after driving to town, I believe I could have done it.  (I do NOT drive in snow or ice!!  I've had about 3 car accidents in my life and 2 were on iced over bridges!)  My eye doctor finally agreed with me that I needed cataract surgery!!  This has been an on-going issue with him and me for about 6 months.  I am scheduled for the surgery on Feb. 13 and I can't wait!  I hate having trouble seeing.  I can only imagine how bad it is for my mom who is legally blind with Retinosa Pigmentosa, a degenerative eye disease.  After the eye doctor, Sonny and I went to Corrine's for breakfast and ran into two of our Pittsburgh buddies who had just gotten there so we all had lunch together.  It was fun and such a coincidence as I was next going to one of the gals' house to drop off the calendar I had made for her to give to her sister when she goes to Florida in a couple of weeks.  (I'll be posting pictures of the calendar tomorrow.)

I have not participated in the Paper Craft Crew Challenge since early December so it was fun to design my card in MDS last night and post it for the challenge.  I used items from the new Occasions Catalog (DSP) and a stamp set from Sale-a-Bration.

The Paper Craft Crew design team has come up with some fun card samples using this week's card sketch.  Go HERE to check out the rest of the cards.  You may click any of the photos to see a larger image, and you may also click the name under the photo to go to the designers blog for more information on their creation.


  • POSTING END TIME:  If you'd like to be considered as one of our Featured Artisans, please be sure to link your project by February 4, 2014 at 11:55 PM EST
  • VOTING:  Voting on submissions starts on Tuesday, February 4, 2014 at 11:55 PM EST.  Voting ends on Sunday, February 9, 2014 at 11:55 PM EST.
SOCIAL NETWORKING and UPDATES…  Look for the Paper Craft Crew on Facebook!  You can like us by clicking HERE!  You can also find the Paper Craft Crew on Pinterest.   Don't forget to sign up for email updates if you haven't done so!  
GUEST DESIGNER OPPORTUNITY…  Each time you participate "adds up" and may earn you an invitation to be a guest designer for a future challenge!  How cool is that…  Also, the more participation by our readers increases the exposure for everyone from participants to the design team to Stampin' Up!  To be eligible as a guest designer, you MUST participate in no less than 5 consecutive sketches AND be able to create a card that is created using 100% Stampin' Up! products. 
BLOG CANDY…  The Paper Craft Crew periodically offers BLOG CANDY!  You will never know when the Blog Candy will show up.   We have to keep you on your toes and coming back for more!  NOTE: shipping of blog candy within the United States is free, unfortunately, we must ask our international winners to pay for shipping on any blog candy they may win.

Tuesday, January 28, 2014

Sale-A-Bration Time!


Woooo Hoooo!  Sale-a-Bration is finally here.  

For those of you who are not familiar with Sale-a-Bration, it’s Stampin’ Up!’s annual event when customers are able to earn really great, exclusive products for every $50 you spend.  That’s not all, though!  You can earn additional hostess rewards for large purchases or hostess parties.  
About the Sale-a-Bration brochure:  Stampin’ Up! mixed things up a bit with this brochure.  The Free Products start on page 12 in this book.  On the pages before the Free Products, Stampin’ Up! has gathered some super-great bundles with different themes that allow you to buy a whole collection of great products with just one product number – and each bundle is just over $50, so you earn a free product with each.  You don’t have to buy from these bundles, but they sure are a helpful suggestion, right?


Let’s all sale-a-brate!  Woooo hoooo!
Thanks for stopping by my blog today!

Monday, January 27, 2014

Cowboy Kid

I actually did some stamping this weekend!  It has been a long time it seems since I have done anything in my stamp room.  I made a few cards and worked on a calendar that I have been commissioned to do.  One of the cards I made, I put aside to let the Crystal Effects dry.  But, do you think I can find that card this morning?  I have looked everywhere!  I must have put it in a safe place OR it has gotten mixed up with some paper or something and who knows where it is!  I'll give it a day or two and perhaps it will show up!  Maybe I had gremlins during the night and Sammie didn't catch them stealing the card!!

Here is one of the cards I made.  It is for my nephew's little boy, Jack IV - who they call IV.  He will be 2 next week and will be welcoming a baby brother soon.  Katrina is due any time now.  Hoping he won't be born on IV's birthday though!  They are hoping she won't go into labor until after IV's party on Sunday.

This card uses the Retired Stamp, Cowboy Kid.  This stamp has always been one of my favorites for little boys birthday cards.  Don't think I will ever get rid of it.  I just think the little cowboy is so stinkin' cute!!


I stamped the image onto a square of white card stock and sponged brown and yellow around the image.  Then I tore the edges of the square.  I used Copics to color the image (Can't wait for SU's Blendabilities!)  I mounted the stamped square on a piece of brown woodgrain paper and tore the edges of it.  I stamped a piece of red (5 1/4" x 4") with another retired stamp - Woodgrain Background using Crumb Cake ink.  I mounted the whole thing on Crumb Cake card stock.  The star is punched with a star punch (another retired punch).  I stamped "Howdy" on a piece of SU's Naturals DSP.

I have been steadily trying to identify my New Zealand pictures - using dates and what we wore in the pictures to catagorize them.  The hardest thing is all the lake pictures.  We visited several beautiful lakes either on our drive and stopping at roadside scenic vistas or when we actually stayed in a town with a lake.  The water is most of them was the bluest I have ever seen - actually turquoise from the glacier run-off.  Thought I'd share a few lake pictures.


Saturday, January 25, 2014

Zorbing

While we were on the North Island, Courtney and Ashley went Zorbing in Rotorua!  Zorbing is a very unique experience.  You roll downhill in a large inflatble globe .... think hamster ball!!  Zorbing offers two rides - a wet ride and a dry ride.  The first time the girls did the wet ride and the next time they picked the dry one.  The only difference that I could see is they put water in the wet ride and not the dry ride and they roll down different tracks.  The girls liked them both and I think could have stayed there all day Zorbing!!  It was a beautiful sunny day so Taffy and I enjoyed sitting in the sunshine and watching them roll!


Later in the day, we had reservations at the Polynesian Spa and Hot Spring.  We were all looking forward to that!  Well, it was the greatest experience.  The brochure made it look very luxurious and even my pictures make it look that way.  But let me assure you, it was not.  There were  about 6-7 shallow outdoor pools filled with mineral water that was very green.  They were all very hot - 100 degrees or more - each one a different temp.  No where did we see any chaise lounges or chairs to relax in (probably would have had to rent them!)  We assumed they would provide towels and even maybe a nice terry robe to use while there.  No - we had to rent towels!  Plus, Taffy did not have a bathing suit so they rented her one.  Even if we had wanted to put our things in a locker, there was a fee.  Believe me, nothing in New Zealand is free!!


Thursday, January 23, 2014

Spiral Flowers

I am loving the new Spiral Die flowers!  And .... it is easy to use.  I watched a You Tube Video about making the flowers and got a few tricks and voila .... beautiful flowers.  We made a card wish a Spiral Die Flower on it in Stamp Club so every one could see how easy they were.  I love using the Coordinations paper and distressing them before rolling them up.

Flower made using Primrose Petals Coordination
  • ·        Card stock is Primrose Petals.
  • ·        Emboss Pool Party card stock with embossing folder.
  • ·        Optional:  Distress edges of Pool Party card stock and Early Espresso card stock.
  • ·        Stamp sentiment (at angle) from Perfect Pennants stamp set onto white card stock and adhere to Early.Espresso card stock.
  • ·        Stamp banners from Perfect Pennants in Pool Party and Raspberry onto white card stock and cut out.  Adhere to card.
  • ·        Wrap Pool Party ribbon around left side of white card stock.
  • ·        Make Spiral Flower.    http://www.youtube.com/watch?v=NNmnSTl8LBM
  •       Distress card stock with sanding block.
  • ·        Adhere flower to card.

Pool Party Coordinations paper - distressed.  I also tipped the edges with blue ink.

Soft Suede Coordinations

I distressed most of these with a Standing Block.  I also used a dauber with White Craft Ink for the edges.

Of course, we had to make a Valentine card!  I thought this was a cute one and could also be used for an anniversary card. I used Love You More stamp set that is available through Stampin' Up until Jan. 27.  The DSP in this card uses Christmas paper (Season of Style) left over from the Holiday mini catalog.

  • Card stock is Cherry Cobbler
  • Adhere strips of Chocolate Chip card stock to top and bottom of DSP paper strip.  Adhere to middle of card.
  • Use Embossing Buddy on white card rectangle first!!! 
  • Stamp globe stamp in Versamark onto white paper & heat emboss with Copper Powder.
  • Stamp globe 2nd time with Versamark onto Coastal Cabana card stock and heat emboss.  Punch out globe with 1” punch  and adhere to globe with dimensional.
  • Use Hearts Framelits (smallest heart) and cut out a heart from Cherry Cobbler card stock.  Adhere to white rectangle with dimensional.
  • Layer white rectangle card stock onto brown card stock.
  • Adhere Cherry Cobbler ribbon on right side and adhere to card

Wednesday, January 22, 2014

Stamp Club Cards for January

Yay!  I finally got around to updating the face of my blog.  Every time I do this, I learn something new - guess you're never too old to learn, huh?  I used My Digital Studio to do the hearts blog title but the rest of the stuff I did with Blogger.  Is it easy for you to read?  I always try to make the print large because I know my eyes need it!

I am feeling so much better.  Yesterday was the first day I started feeling like a human and today is even better.  I don't feel like I have to nap every few hours and I'm only blowing my nose about every couple of hours (too much information?!)  Sonny and I went out for dinner last night at My Sisters Cafe  and I could even taste the food.  Tonight we are going with friends for Restaurant Week at Chillfire, a restaurant I have been wanting to try for several months.  Can't wait!

It has turned really cold here.  It dropped to 19 degrees last night and tonight 11 degrees is predicted!  The high temps all week are in the low 30s but warming to the 40s by Friday!  Monday was a beautiful day - in the 60s.  Unfortunately, I didn't feel up to going out and enjoying that weather!  I'm mising those 80s we had in New Zealand!!

Here are a couple of the cards we made this week in Stamp Club.  I really tried to reduce the amount of stuff I had to carry downstairs for our card making and used one of the new Occasions stamp sets on three of the cards!!

File Folder Card
 For the file folder card, I followed a tutorial to make the folder using the Envelope Punch Board (love it!) that I found on-line.  It is easy to find instructions - just google file folder card and you will see many websites and videos.  I used the new Banners Framelits.  After you have made the file folder (I used Basic Gray card stock) -


  • ·        Use Fancy Fan embossing folder to emboss front ½ of file folder
  • ·        Use Fringe Scissors to fringe 2 strips of Crushed Curry. Layer under strip of Afternoon Picnic DSP.
  • ·        Stamp “Life doesn’t have to be ….” from Perfect Pennants (Occasions Catalog) using Wisteria Wonder ink.  Use Banners Framelits to die cut banner. (use 3rd smallest banner) 
  • ·        Die cut Wisteria Wonder with Banners Framelits (use 4th smallest).  Layer white banner onto purple.
  • ·        Use open tab from Chalk Talk Framelit & cut opening onto top of Banner.  Thread Summer Starfruit ribbon through.
  • ·        Make 3 flowers with clay and molds and ink with Wisteria Wonder, Crushed Curry and Coastal Cabana and glitter)
  • ·        On inside, stamp sentiment and adhere strip of Afternoon Picnic paper   Trim to fit.


Base card is Summer Starfruit

Crisp Cantaloupe - this is the one we made


  • ·        Card stock is Crisp Cantaloupe.
  • ·        Layer Birthday Basics paper onto Gumball Green card stock and adhere to left side of card.
  • ·        Use Banner Framelit to cut 1 white (3rd smallest) and 1 Raspberry Ripple (4th smallest)
  • ·      Stamp “MAKE a WISH” (Perfect Pennants set) with Gumball Green ink onto white card banner.  Layer onto Raspberry banner.  Wrap Bakers Twine around and adhere to right side of card.
  • ·      Stamp “a” using Raspberry Ripple ink.  Punch out with ½” Circle Punch.  Adhere to sentiment with dimensional.
  • ·        Stamp “confetti” using the Cupcake Punch and adhere to corners of card.


I prefer this card made with Summer Starfruit and that was my intention BUT I neglected to order Summer Starfruit last month and I only had one sheet left.  I also gave the gals an option to do the card in Bermuda Bay.

Tuesday, January 21, 2014

Weekly Deals and more pics

WEEKLY DEALS JAN 21-27

Ready for a few more New Zealand pictures?   We went to a Glow Worm cave on the North Island.  Ashley and Courtney enjoyed the caves while white water rafting while Taffy and I enjoyed a slower pace of riding in a rubber raft through the caves.  The glow worm is unique to New Zealand. Thousands of these tiny creatures radiate their luminescent light.  It was really cool to see all the hundreds of glow worms - looked like a million stars in the sky.  Unfortunately, it is so dark in the caves, pictures don't come out and you are not allowed to use a flash.


Taffy and I with our hard hats (with light) on ready to do some caveing.

These are spun by the glow worms and are hanging from the top of the caves.
This was our hotel for the night!

This was a real ship.  It is part of New Zealand's history as 12 were built for anti submarine patrol in the Islands during WWII and only a couple survived including this one, The Motunui, which is now renamed as The Waitanic.   Taffy and I were not too sure about the beds but it was the best sleep we had the whole trip I think!  So comfy!

This place also has an airplane and a hobbit house that you can sleep in. 

Picture of the 1950's Bristol Freighter Accommodation

THe Hobbit Motel Units

Enjoying a cool one after cave-ing