Showing posts with label two-step stamping. Show all posts

Wednesday, January 30, 2019

Stamp Club Cards part 2

I can't believe I will be celebrating 14 years with Stampin' Up in a couple of weeks (Feb. 16).  Seems so long ago that I attended a workshop in Gig Harbor, Washington and signed up a few weeks later.  It was the first time I'd ever heard about Stampin' Up.  What a journey this has been.

Below is another card that we made at Stamp Club last week.  I gave them their choice between this one and the next one.)  I used the Stitched Rectangle Dies on the Lemon Lime rectangle and the white stamped rectangle.  I love these colors together - Lemon Lime Twist, Highland Heather and just a bit of Daffodil Delight.  The stamp set is Incredible Like You, another set we received at convention in November.  There is also a coordinating Project Kit you can purchase (pg 21, Occasions).


For this card, I pulled out a piece of the Gingham Gala 6"x6" DSP.  I love this paper!!  The flower stamped on this card uses the Two-Step Stampin' technique which is my favorite.


This card was a fun one to do and introduced a new technique to my gals.  Using a clear "D" block, I scribbled color from SU Markers (not Blends) on the block, spritzed it with water and stamped my paper with it.  You need to hold it down for a short time to get the inks into the paper.  Every card that you make will be a little bit different.  Next I used the Stampin' Blends to color the cake and adhered a few enamel dots.  I used a spritzer (retired) to spritz Melon Mambo on the card.  Do you notice the stitching around the white card?  Well, this is my favorite thing in the Occasions catalog!  Check out page 28 - the Rectangle Stitched Framelits!  There are 13 in the pack and all different sizes.  Love them!!  The stamp set is on page 28 of the Occasions Catalog, Amazing Life.  You can purchase the stamp set AND the Rectangle Stitched Framelits as a bundle, saving 10% if you bought them separately.


Thursday, May 30, 2013

Raining Flowers - going, going .....

Only a few more days to show off these stamp sets that are retiring.  This one is Raining Flowers, a two step set that I got at convention a couple of years ago.  I really haven't used it much but I really like this card!  Don't you love these colors?  Think they are my favorite!  I used Regal Rose, Tempting Turquoise, Certainly Celery and Daffodil Delight.  I popped up the two flowers and used a piece of retired (a long time ago!) grosgrain ribbon about the card with pearls in the centers.  I also used the Framed Tulips embossing folder on the white card stock.


Wednesday, April 11, 2012

Monday Mailer from March

This is a card I made for a Monday Mailer in March.  When I was in Texas, I forgot to share it with you.  I love this card and the stamp set.  I need to dust it off and use it more.  I used Field Flowers, Just Believe and the Butterfly Embosslits with some masking.  The flowers are stamped in Daffodil Delight and Peach Parfait using the two-step stamping technique.


Tuesday, May 24, 2011

Dancing with Anniversary and Birthday Cards!

I'm gonna try and write this while I'm watching the finals of Dancing With the Stars!  Sonny even taped it downstairs so he could watch it with me!!   All season I would tape it upstairs and watch it the next day.  He would come up and just watch Hines Ward perform.  I'm hoping Hines wins tonight!!!

So, I have a couple of anniversary cards to make.  Last year this time, I was headed to Texas for two weddings (and luckily, not a funeral - get it??  a movie title!)  I forgot to take a picture of one of the cards today before I mailed it.  I made it using the (retired) Wild Rose stamp set that I got for $3 recently at Stampers Alley's used stamp sale.  What a deal!!  But, here is the second anniversary card I made using the wonderful Sizzix Daisy Die.

I love this die and used it to cut out 3 different sizes of the daisy in Real Red.  The leaves are Pear Pizazz punched out with the Owl Punch.  The heart border punch is non SU.  I used the Polka Dot background stamp (retired) on the white cardstock for the background and then ran it through a Polka Dot embossing folder for some added texture.  The brad in the middle is also retired from SU - I think I got it in the Clearance section.

I have also been making birthday cards.  I have about 10 birthdays in June!  Here is the one I made tonight using the Wild Rose stamp set ($3!!!).


This is my favorite style of stampin - two step stamping.  It is what got me involved with Stampin' Up to begin with. The colors I used on the flower are Peach Parfait and Pumpkin Pie.  The leaves are Pear Pizazz and Wild Wasabi. 

Tuesday, March 8, 2011

Baby Blossoms Monday Mailer

I wasn't so sure about this stamp set at first but after seeing all the pretty cards different people had made with it, I changed my mind.  Plus, it is a 2-step stamping technique set.  SU's two-step stamping is what attracted me to the company in the first place.  I love that technique.  There are several sets in the SU catalog that feature this technique.  They are noted in the catalog by this symbol:


The way two-step stamping works is that you stamp the first image in your lightest color.  Then you stamp the second image on top of the first image in a darker coordinating color.  For the Baby Blossoms stamp set, there are a lot of small images.  I ordered the clear set (less expensive plus better for space purposes!) and after putting the set together, I kept the rubber piece that you punch from and put my stamps back in the holes.  That way, I can tell at a glance if I am missing one of them and it is easier to find the stamp that I need.  


I also made a "cheat sheet" for stamping the images.  This is helpful to see which stamps go together.  Here is a close up picture of it.

Of course, a lot of these pieces can be interchanged to be used with each other - like the different size leaves, etc. but this is a good guideline if you need it.
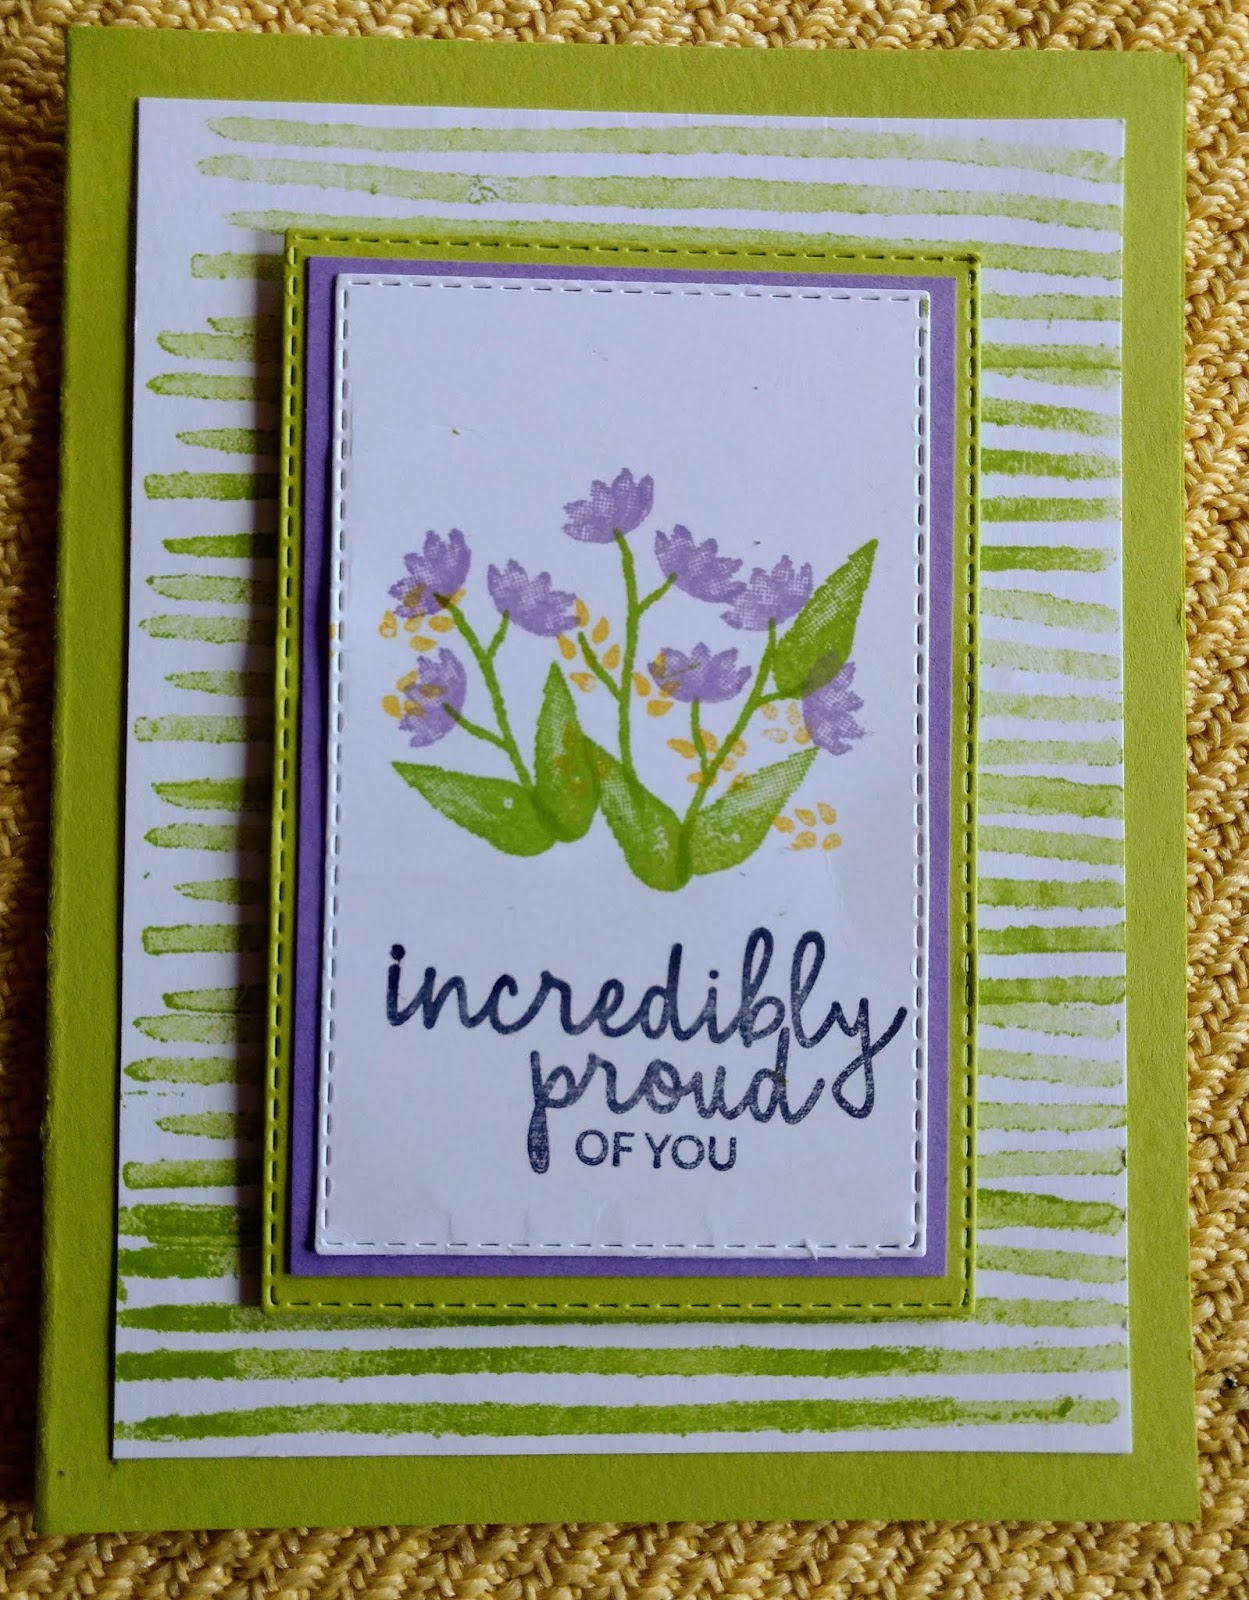
So, on to the card I made with this set.


Doesn't this look like springtime???  I just love the colors - Baja Blue, Regal Rose, Old Olive and So Saffron.  The card base is Sahara Sand and the "white" piece that I stamped on is Confetti White.

I just learned how to make those ribbon rosettes too and was so excited that my first one actually turned out!

You need 10" piece of Seam Binding Ribbon (satin will probably work too), 1" circle punch, sticky tape, Crop a Dile.
Here is what I did:  punch a 1" circle from Baja Blue cardstock and a 1" circle from SU's sticky pages (or you can use red-line tape instead).  Cover the Baja Blue cs with the sticky circle (this will be the front side.)   Leave the protective cover on the sticky circle for now.  Punch a small hole in the middle of the circle with your Crop-a-dile and then cut a slit from the middle circle to the edge of the circle (just one side).  Put a piece of red-line tape on the opposite side of your slit.  Now, feed your 10" piece of seam binding ribbon up from the FRONT of the circle and stick the end down to the tape you put opposite of the slit (back side of circle).  Now, on the other end of the ribbon, cut it into a point so that you can grab 2-3 threads and pull them, gathering the ribbon.  Work your gathering down through the whole ribbon until you have about 8" length of ribbon.  Now, take the protective cover off the circle and begin rotating the circle while you stick down your gathered ribbon, creating a flower.  When you get to the end, pull your end piece around to the back and tape it down with red-line tape.   Voila!  You should have a rosette!

For those of you who do better with seeing the project, there is a video tutorial,  HERE.

This is my first Monday Mailer to Brenda.  Hope she likes it!!

I still have not been able to skype with Ashley but at least I am reassured that she is ok.  Her internet has been down in her building since last Friday.  She was able to send me an e-mail at the clinic although she cannot access her personal e-mail there.  I'm sure she knew I was worried.  She hopes it will be working later today and we can talk.  She has been really busy since she is the only doctor on site now.  The other docs are relieving people on leave at other bases.  She told me that the weather has been bad there for a few days.  I thought this was interesting - "The weather has been crappy the past couple of days...last night and this morning it is actually raining mud which is really disgusting.  After walking home with a to-go plate last night, the top of the white styrofoam was covered with orange colored rain drops...The sky in front of the aid station this morning was bright orange which was pretty cool although I guess it was actually mud containing rain clouds."  So I guess we can be thankful for the weather we have here in the states!!