Showing posts with label Stamp Club. Show all posts

Monday, March 23, 2020

I'm back!! Stamp Class Cards for March

OK, OK, OK!!  I know it's been almost a month since posting and you're looking for some new ideas.  Let's see what I can do to help you out.  My stamp class was last week and as you imagine, I only had 2 brave souls who came to play.  I had hand sanitizer on the table along with anti-bacterial wipes and plenty of toilet paper in the bathroom!!  But we had a good visit and made some pretty cards.  Let's see if you agree.

I just love this pink and green combo!  I used Granny Apple Green and (retired) Powder Pink.  The sentiment is heat embossed with white powder.  I fussy cut the Meercats and used dimensionals to adhere them to the Stitched Shapes Circle.  I used the Stitched Rectangles for the pink, green and white cardstock.  Use the Blends to color the background items.

This beautiful paper is a Sale-A-Bration item - Golden Honey.  The flower is from Painted Poppies and I fussy cut it.  I have fallen in love with these dies - Stitched So Sweetly.  You can find them in the mini catalog on page 20.  Don't miss them like I did! 

Another Sale-a-Bration item is the So Very Vellum on this card.  The package comes in three colors - Purple Posy, Pool Party, and Soft Sea Foam.  The picture looks like it's green but it's not - I used Pool Party.  I'm loving those Stitched So Sweetly Dies again on this card.
SO VERY VELLUM SPECIALTY DESIGNER SERIES PAPER
Beautiful!


This Easter card uses everything retired (except the Granny Apple Green base card and the Blends. 

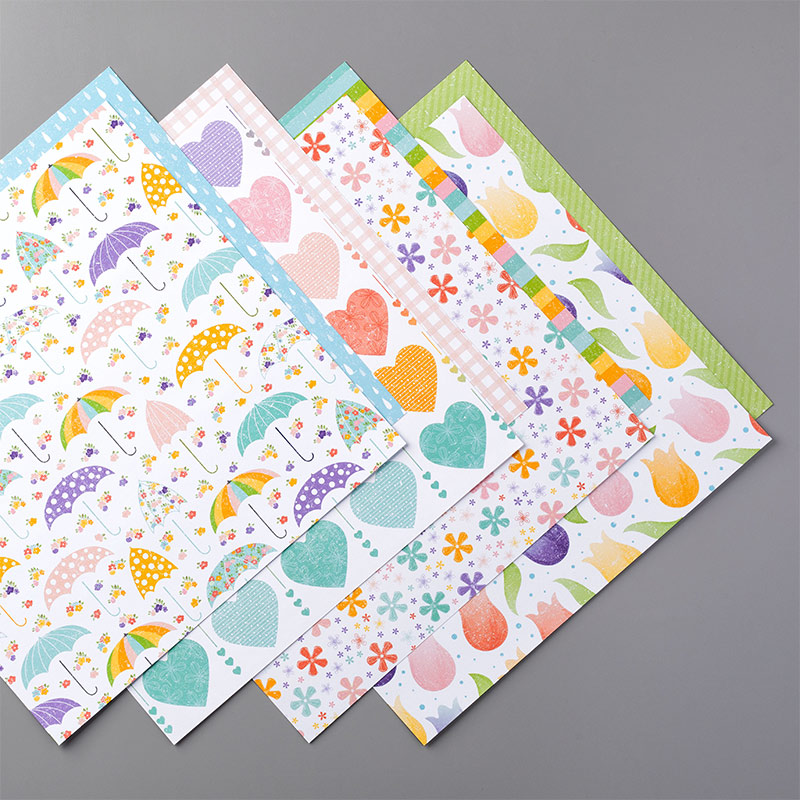
This was a fun card to make.  It measures 4 1/4" square.  All the squares of DSP are from and the umbrella, heart, tulip and small flowers are all from the DSP too!  I used a retired Heart Die set to punch out the heart but the current Heart punch pack works good too.  The umbrellas are punched with the Umbrella Builder Punch and the tulip is  punched with the Tulip Builder Punch.  The small flowers can be punched with the Small Bloom punch but since I didn't have that punch, I found that my retired Petite Petals Punch worked fine.  I also don't have the tulip punch so I fussy cut it and the leaf.

PLEASED AS PUNCH DESIGNER SERIES PAPER
I love this paper!  It does a lot of the work for you and it is so spring-y!!  If you are interested, (since it is not in any of the catalogs), the item # is 153558 and it costs $11.50 for 12 sheets of 12"x12" paper.

Saturday, February 29, 2020

February Stamp Class

I'm back home!  It was a fun trip and I was sad when it was over .... but it's always good to sleep in your own bed!!  I've been on the run ever since I returned home with doctor appointments, playing cards and stamp club.  Today was good to just do nothing but getting caught up on laundry, etc.

Here are the cards we made this month in class.  They really like them!

Stamp set & dies - Positive Thoughts.  There are a lot of nice decorative dies in this kit.  If you look closely, you can see the punched trim around the white cardstock.   And check out the decorative piece hanging just beneath the sentiment.  I used Balmy Blue and Pear Pizzazz.

DSP from a variety pack that I was able to order as a demo.  This piece is from Best Dressed (mini catalog).  I stamped the cake (Happy Birthday to You - a Sale-a-Bration stamp) with Versamark and heat embossed it in white.  We used alcohol markers and colored on the back of the vellum in various shades of pink and green.  I mounted the vellum onto a piece of white cardstock to make it stand out better.

This was a WOW card that is really simple to make.  I stamped the Dandelion in StazOn Black ink onto a piece of watercolor paper.  I used the Aqua Pen to color the little flowers in Daffodil, Melon Mambo, Pacific Point,  Gorgeous Grape and Pear Pizzazz.  On a scrap of watercolor paper, I blended the same colors and punched them out with a Circle Punch and then stamped the sentiment in StazOn.

This was the favorite - an easel card that looks so elegant!  The Highland Heather piece is embossed with Country Floral folder.  The DSP is Magnolia Lane that we colored with SU Blends.  What a difference it makes!  I really love the silver oval piece that is embossed with the Heirloom Stampin Cut and Emboss folders.

Another simple card but with the silver paper embossed with the Subtle folder, it really packs a punch.  The DSP is retired now but anything would work.
I hope you enjoyed these cards and make a few for yourself!

Thursday, January 23, 2020

2020 January Card Class Cards

Well, it's 2020 and has been for almost a month.  And what have I been up to this new year??!!!  Obviously, it hasn't been blogging and I apologize to my loyal fans who have asked me what is going on!  I have no excuse except probably laziness and staying busy playing Hand and Foot, Bridge, enjoying the holidays and making a few cards!   I spent Christmas at my daughter's house.  We drove to Maryland on Dec. 20 in time to celebrate her birthday on 12/22.  We had a pretty low key visit and I ate way too much!  We returned home on Jan. 2 and I have been trying to lose a few pounds since then!  I just made my WW weigh in last week by about 1 pound!

Last week I had Stamp Class in my home.  I had a couple of new gals join us and I think they really enjoyed being creative.  Here are  the cards we made:

Lovely Lily Pad stamp, Petal Pink ink and wash on watercolor paper

I used (retired) Powder Pink for this magnolia (Good Morning Magnolia stamp).  The striped background is with the (retired) Brushstrokes background stamp.

The gals had their choice of the pink card above or this Mint Macaron card.  I colored white ribbon to match the card.  The leaf is from Daisy Lane stamp set.

A great masculine Valentine.  

This was my favorite!  Hearts are from the Stitched Be Mine dies - in vellum, Powder Pink and Whisper White.  

Easy using Painted Poppies stamp in the Mini Catalog.  We colored the flowers with a Blender Pen and Berry Burst ink (retired)

I hope you have enjoyed these cards!

Wednesday, November 27, 2019

Stamp Club

I am trying to get ahead for Thanksgiving this year.  I have the table set, several of my casseroles ready to go in the oven, the decorations on the table .....  I hope to be able to enjoy the day and not spend it in the kitchen!  Don't get me wrong - I don't do it all on Thanksgiving.  Sonny deep fries the turkey outside, my sisters bring food, and Ashley makes a few things.  I don't want to have too much down time or I'll be munching on the appetizers!!  I'm trying a couple of new dishes this year.  Instead of my normal mashed potato casserole, I have made a scalloped potato dish and I'm trying out a pear/cranberry chutney dish and a corn casserole.  We'll see if they get a thumbs up!

I had Stamp Club last week.  There weren't many there but we had a nice time visiting and creating.  Here are the cards we made:


I love this snowman and the Designer Paper that goes with it!


I think this was the favorite of the gals this month - and so easy!  We did a lot of sponging and tone on tone stamping with Crumb Cake.  I used the Rooted in Nature stamp set.


I love this one with the colorful butterflies from Butterfly Gala.  I colored them with the Blends.


I punched out the vases from the Mosaic Designer Paper.  Didn't they turn out great?  I love that paper.  I used the Stamparatus to line up the flowers before adhering the vases to the card.

I hope you have a wonderful Thanksgiving and are able to share it with family and friends.  We'll have 10 at our table this year - the more, the merrier!

Thursday, August 22, 2019

Cards from Stamp Club

I have a few more cards to share with you that we did on Tuesday's Stamp Club.


This card is so simple to make but is so elegant.  I used the Magnolia Embossing Folder to emboss the piece of Mossy Meadow cardstock.  I find that if you spritz your cardstock before embossing, you will get a much better impression.  The card above was spritzed and the card below was not.

We fussy cut out one of the flowers from the Magnolia Lane Designer Paper and adhered it to the card with a dimensional.  The sentiment is from Well Said (in the annual catalog.)  The ribbons that I used on both cards has been retired but use what you have!


This was another easy-peasy card to make.  The thick white cardstock makes the base of the card.  The next layer is Lovely Lipstick and next is Rococo Rose.  I embossed the Rococo Rose piece with the Country Floral embossing folder (a definite favorite!)  Next I sponged white craft ink over the floral image and adhered it to the Lovely Lipstick piece.  The sentiment is from Flourishing Phrases, another great stamp set to have for it's sentiments.

Wednesday, May 22, 2019

May Stamp Club

These are the cards we made in Stamp Club last week.


Retiring Sunshine Sayings.  I have a lot of washi tape and let the gals pick the ones they wanted to use on their card.


This is a little 3"x3" card with a matching envelope.  Tropical Chic will be in the new catalog but not the bundle.  So if this is something you like, I'd suggest ordering it now to save a little cash.


My Stamparatus sure came in handy on this card!  Broadway Birthday will be in the new catalog but again, not the bundle.


This was my favorite card that we made.  I love the Powder Pink and Crumb Cake together.  The stamp set, Wishing You Well, is retiring.  Also, the die I used (Swirly Snowflakes) will not carry over to the new catalog.


I let the gals pick the color and the stamp they wanted for this card.  The stamp set I used is A  Good Day, another retiring set.


Friday, February 22, 2019

February Stamp Club

Yesterday was my stamp club meeting.  I have decided to try something new this year.  Instead of the gals having to order $20 from Stampin' Up, they can either do that or just pay $20 for the class.  I have heard from several people who dropped out of Club that they just didn't need anymore stuff and found when they purchased stamps, etc. they just weren't using them at home.  But they were willing to pay for the class instead.  Works for me!

I also switched up how I did the class.  I couldn't decide which cards to offer for club, so I just put 8 cards out (in their basket with pieces precut) and told them they could make 4 cards - any ones they wanted.  It was funny - only 4 cards were picked.  One gal made 2 each of two birthday cards.  So I will be saving the other cards for next month.  I've got a couple move gals coming next week since they couldn't make it today.  We'll see if they pick anything different.

These are the four my friends picked to make today.


Amazing Life stamp set from Occasions Catalog (pg 28)  The happy, flowers and cake were colored with SU Blends.  I used the Rectangle Stitched Dies - my favorite thing in the catalog!!


So Hoppy Together - from Sale-a-Bration - is such a fun set.  Nancy had fun coloring Mr. Frog!


This humming bird is a big hit! This set is another one from Occasions Catalog - Humming Along.  I didn't purchase the framelits so the girls had some cutting to do but it wasn't difficult.  The bird was water colored with ink from the stamp pads.  The lesson I learned - don't color him with the Blends because they soak through the card stock and you can see it on the back. He was colored with Mint Macaron, So Saffron and Calypso Coral.


Another variation of the Amazing Life birthday cake.  A ink wash was put down first before stamping the cake.  Everything else was colored with the Blends.


This was the favorite!  I embossed the flower and humming bird in gold and it looks amazing!

Wednesday, January 30, 2019

Stamp Club Cards part 2

I can't believe I will be celebrating 14 years with Stampin' Up in a couple of weeks (Feb. 16).  Seems so long ago that I attended a workshop in Gig Harbor, Washington and signed up a few weeks later.  It was the first time I'd ever heard about Stampin' Up.  What a journey this has been.

Below is another card that we made at Stamp Club last week.  I gave them their choice between this one and the next one.)  I used the Stitched Rectangle Dies on the Lemon Lime rectangle and the white stamped rectangle.  I love these colors together - Lemon Lime Twist, Highland Heather and just a bit of Daffodil Delight.  The stamp set is Incredible Like You, another set we received at convention in November.  There is also a coordinating Project Kit you can purchase (pg 21, Occasions).


For this card, I pulled out a piece of the Gingham Gala 6"x6" DSP.  I love this paper!!  The flower stamped on this card uses the Two-Step Stampin' technique which is my favorite.


This card was a fun one to do and introduced a new technique to my gals.  Using a clear "D" block, I scribbled color from SU Markers (not Blends) on the block, spritzed it with water and stamped my paper with it.  You need to hold it down for a short time to get the inks into the paper.  Every card that you make will be a little bit different.  Next I used the Stampin' Blends to color the cake and adhered a few enamel dots.  I used a spritzer (retired) to spritz Melon Mambo on the card.  Do you notice the stitching around the white card?  Well, this is my favorite thing in the Occasions catalog!  Check out page 28 - the Rectangle Stitched Framelits!  There are 13 in the pack and all different sizes.  Love them!!  The stamp set is on page 28 of the Occasions Catalog, Amazing Life.  You can purchase the stamp set AND the Rectangle Stitched Framelits as a bundle, saving 10% if you bought them separately.


Tuesday, January 29, 2019

Stamp Club Valentines

I had Stamp Club last week and we made a few Valentines and other cards from stamps that I received at convention.

This first one is from this month's Paper Pumpkin.  This kit had a lot of supplies in it to make a bunch of little Valentine boxes.  I let the gals make as many as they wanted to give to their grandkids & I still have a lot left.  I'll probably be making some alternative projects with the supplies after I make a few boxes.  If you are not familiar with Paper Pumpkin, it is a great kit that you receive each month.  You can stop and restart it at any time with no obligation.


I'm anxiously awaiting the February kit to see what cute projects are in store.  Here is a sneak peek!


We made two Valentine cards at club.  The one below features a new stamp set from the Occasions Catalog, Meant to Be with Lovely Lipstick and Powder Pink card stock.  You can purchase this set and the dies as a bundle which is what I did, saving 10%.  I love the heart dies!!


The Meant to Be stamp set is a Cling Stamp set.  If you experienced some difficulty getting the Stampin' Up! stamps to stick to your clear blocks in the past and you stopped putting labels on them like I did just to help them stick, then you are going to love SU's Cling Mount Stamps.  You can confidently put the image labels on and they will cling perfectly to the clear blocks.  I would definitely recommend you watch this video for tips on putting the labels on and removing the stamp from the clear blocks.


This second Valentine also uses the Meant to Be bundle with Powder Pink and Crumb Cake.  I couldn't believe that in all my stash of designer paper, I could not find any with hearts on it and forgot to order the SU DSP!  So, I cheated and picked up a couple of sheets from a big box craft store near me for the card.


Here is a short video highlighting the stamp set and Be Mine dies.


 I'll be back tomorrow to share the remainder of the cards we made.

Tuesday, June 26, 2018

My Stamp Club met last week and we made some fun cards.  You can sure tell it's summer time though - I had a really low attendance this month.  But we had a good time anyway!  Now I'm patiently waiting for some new products to arrive via Mr. UPS!!

Here are the cards we made using some new products and some that have been gathering dust on my shelf!


Supplies: 
Ø  Ink:   Grapefruit Groove, Smoky Slate, Blueberry Bushel, Granny Apple Green  
Ø  Cardstock:   Very Vanilla Thick CS    
Ø  Stamps:    Jar of Love 
Ø   Framelits – Everyday Jars
Instructions:
Ø  Stamp background jars with Smoky Slate.
Ø  Stamp the string around the jars w/Grapefruit Groove
Ø  Stamp 1 jar in Whisper White and die cut.
Ø  Stamp a bow w/Grapefruit Groove and die cut.
Ø  Stamp about 5 stems of leaves w/Granny Apple Green & die cut.
Ø  Adhere leaves to card with glue.
Ø  Stamp sentiment on Jar in Blueberry Bushel ink.
Ø  Use dimensionals to adhere Blueberry Bushel Jar to card.
Ø  Adhere bow to jar.


Supplies: 
Ø  Ink:   Blueberry Bushel, Highland Heather, Flirty Flamingo, Black, Granny Apple Green
Ø  Cardstock:   Thick CS, Whisper White, Daisy DSP (retired)
Ø  Stamps:   Love What You Do
    White Twine & Dimensionals
Instructions:
Ø  Cut 3 panels at 3” x 4 1/8” & 3 panels at 3 ¼” x 4 3/8”
Ø  Stamp the flowers on the 3 smaller panels.
Ø  Stamp “thank” on the bottom of one panel; Stamp “you” on the bottom of one panel in black.
Ø  Tie white twine around 3rd panel (that you did not stamp on bottom)
Ø  Mat the 3 panels onto the larger 3 panels with dimensionals.
Ø  Adhere strip of DSP in center of white card.
Ø  Adhere panels to card.


I love, love, love this stamp set!!
Supplies: 
Ø  Ink:  Black, Whisper White
Ø  Cardstock:   Thick CS, Rich Raspberry, Basic Black
Ø  Stamps: Serene Garden, Sheltering Tree (sentiment)
Ø  Framelits –Garden Scene Framelits
Ø  Subtle Embossing Folder
Ø  Stampin’ Blends
Instructions:
Ø  Emboss flower (framelit) in bottom corner of Thick card; fold in half
Ø  Stamp image onto White CS (using Stamparatus).
Ø  Stamp & Die Cut single flower and butterfly.
Ø  Use Stampin’ Blends to color all images.
Ø  Stamp sentiment onto Rich Razzleberry strip of cardstock with White Ink (Use Embossing Buddy FIRST)
Ø  Emboss sentiment and cut flag at end.
Ø  Emboss sentiment w/the new Subtle Embossing Folder.
Ø  Adhere butterfly, single flower & sentiment with dimensionals.  Layer onto black cardstock & then onto card.


We had trouble getting the sun out of the framelit without tearing it up.  I suggest when you use these framelits, you sandwich a piece of wax paper between the cardstock and the framelit.

Supplies: 
Ø  Ink:  Pineapple Punch, Blueberry Bushel, Lovely Lipstick, Pool Party
Ø  Cardstock:   Soft Sea Foam, Blueberry Bushel, Whisper White, Pineapple Punch
Ø  Stamps:  Swirly Bird, You Are My Anchor (April Paper Pumpkin)  
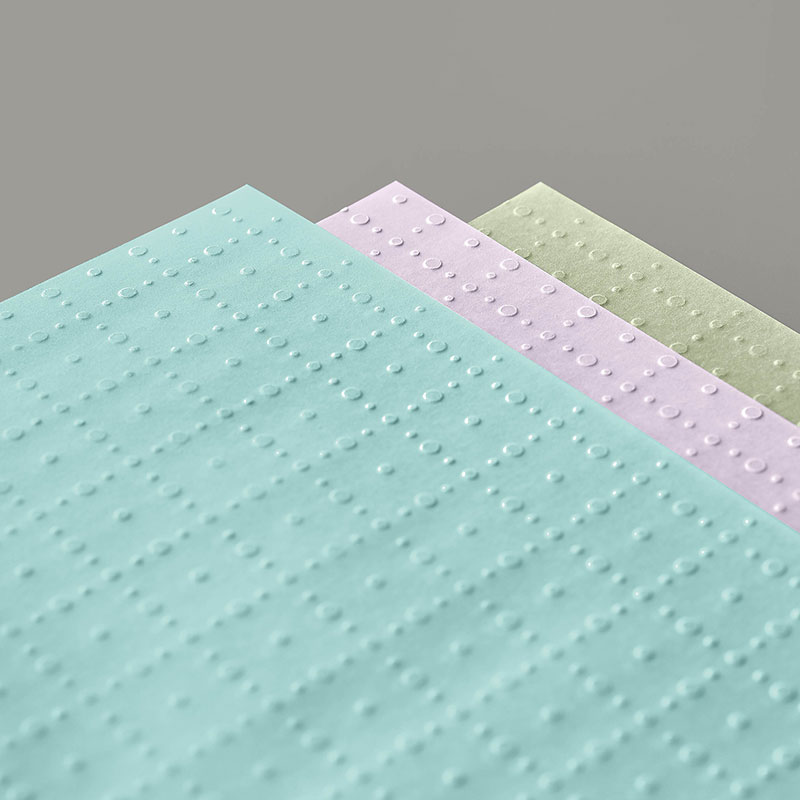
Ø  Swirly Scribbles Thinlets, Duet Banner Punch, Seaside Embossing Folder
Instructions:
Ø  Die cut swirly sun
Ø  Stamp swirl from middle of die cut swirly piece (sun) with Pineapple Punch (or for darker image, use Daffodil)
Ø  Emboss Soft Sea Foam panel with Seaside Embossing Folder & adhere to Sea Foam card
Ø  Adhere “wave” & sun to card.
Ø  On scrap white paper, stamp sailboat – cut out.  Adhere w/dimensionals.

Ø  On scrap white paper, stamp sentiment & use Duet Banner Punch.  Adhere with dimensionals.
Monday, May 21, 2018

May Stamp Club

I held Stamp Club this past Thursday and ended up with 7 ladies - 2 new ladies and 5 club members.  It was a little chaotic but I think everyone had a good time.  I tried to concentrate the cards on retiring products this month.

The DSP varied in colors and they had the option to use this side with the script or the other polka dotted side.  The retiring stamp set is Garden In Bloom.  I used the Scalloped Tag Punch on this card.  I will miss this stamp.
  

For this card, I used Oh So Eclectic (yay!  it's NOT retiring.)  I cut the flowers out with the matching dies to this set in Soft Sky and Peekaboo Peach (both retiring as is the seam binding I used.)


This was a fun card!  The retiring items on it are the raindrops and the sentiment - both from Sprinkles of Life.  The umbrella and girl are from Beautiful You - definitely NOT retiring!  Another choice for rain is a diagonal line stamp from the retired Gorgeous Grunge.

Instructions:
Ø  Position the long white panel onto the white layer and temporarily hold it in place with washi tape.
Ø  Stamp the image of the lady across the narrow panel with black ink so the top of the umbrella and her ankles are stamped on the larger white panel and the rest of her is on the narrow white piece.
Ø  Lightly stamp rain.
Ø  Stamp umbrella onto DSP.
Ø  Stamp sentiment at bottom right.
Ø  Color the girl with Blendabilities or Watercolor pencils.
Ø  Adhere bottom of umbrella onto narrow panel and the top of the umbrella on to the card.
Ø  Mat the narrow piece onto black cardstock carefully positioning it so umbrella & legs line up.
Ø  Adhere to white cardstock with dimensionals.


The retiring item on this card is the Color Theory DSP.  I have used this paper a lot!  The stamp set is one that was in the retiring Occasions Catalog but will be in the new Annual Catalog called A Good Day.  The Layering Circles framelits makes it a super easy card.  I used Blendabilities to color the images.

I probably won't be blogging much in the next couple of weeks.  I am taking my Mom to Hawaii to visit Ashley.  Ashley surprised Mom with a ticket to Hawaii for Christmas and Mom has been counting down the days.  She is so excited.  Wish me luck on this venture with my almost 90 year old legally blind mother!!  I borrowed a wheel chair from a friend so that should make it a little better.  Luckily, Ashley is very patient with her and will be a great help.

I have my two latest Paper Pumpkin kits that I have not opened yet.  I am planning on taking them on the plane to work on them during the long flight.  We fly from Charlotte to Phoenix (4 1/2) hours and from Phoenix to Honolulu (6 hours).